In this guide, we will walk you through the installation steps of the Senzo-U device. This guide is applicable for workstations, meeting rooms, and phone booths.
Overview of the Senzo-U
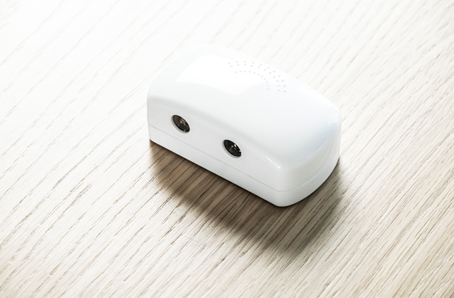
Figure 1 – Back panel

- Power Switch
- Power (MicroUSB)
- LED
- Reset
Accessories
The Senzo-U comes with:
- Hardware User Guide
- Zip tie and self-adhesive anchor
- Micro USB Cable
- Multi-port Power hub & 5V / 1A USB Wall charger (Plug type depends on region)
Installation
This chapter shows how to connect and install the Senzo-U.
Wi-Fi Network
A pre-configured Access Point (AP) is required and it can be either provided by the customer (existing network) or by SenzoLive. Please check with our representatives for the default network information.
SenzoUnit works only with a 2.4GHz band.
Overview of Installation
This part is applicable for both Demo or small team installation. The duration for each sensor should not exceed 2 minutes per desk and the steps have been calculated to achieve a quick and reliable process.
Step 1 – Scan & add the SenzoUnit to the platform (Skip if it has been prepared by SenzoLive beforehand)
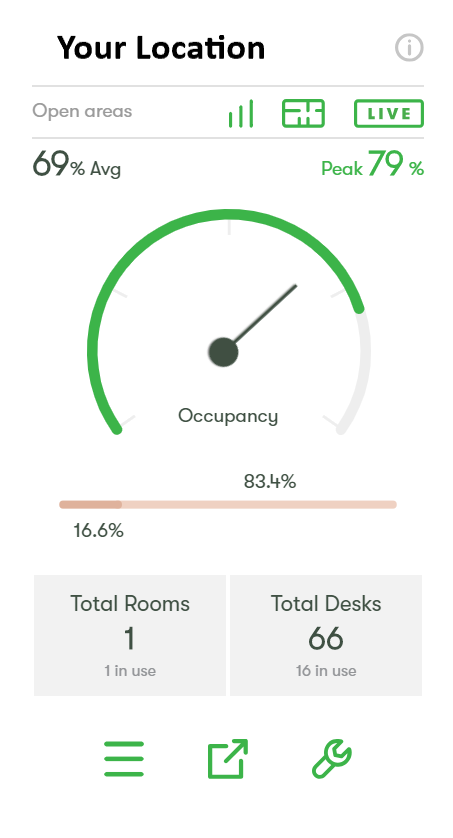
Using the provided account to access https://software.senzolive.com/, choose the installation area from the Homepage and press “Live” ![]()
To start adding sensors, choose the ![]() icon on the top right corner, it will generate a “node” which equivalent to a sensor.
icon on the top right corner, it will generate a “node” which equivalent to a sensor.
Select the location of the sensor and left-click directly on the floor plan. A pop-up window will appear prompting for the sensor’s information.
Connect a USB Optical barcode scanner to the laptop and scan the MAC address label of the sensor. Once scanned, the value will appear on the field. (see Figure 2).
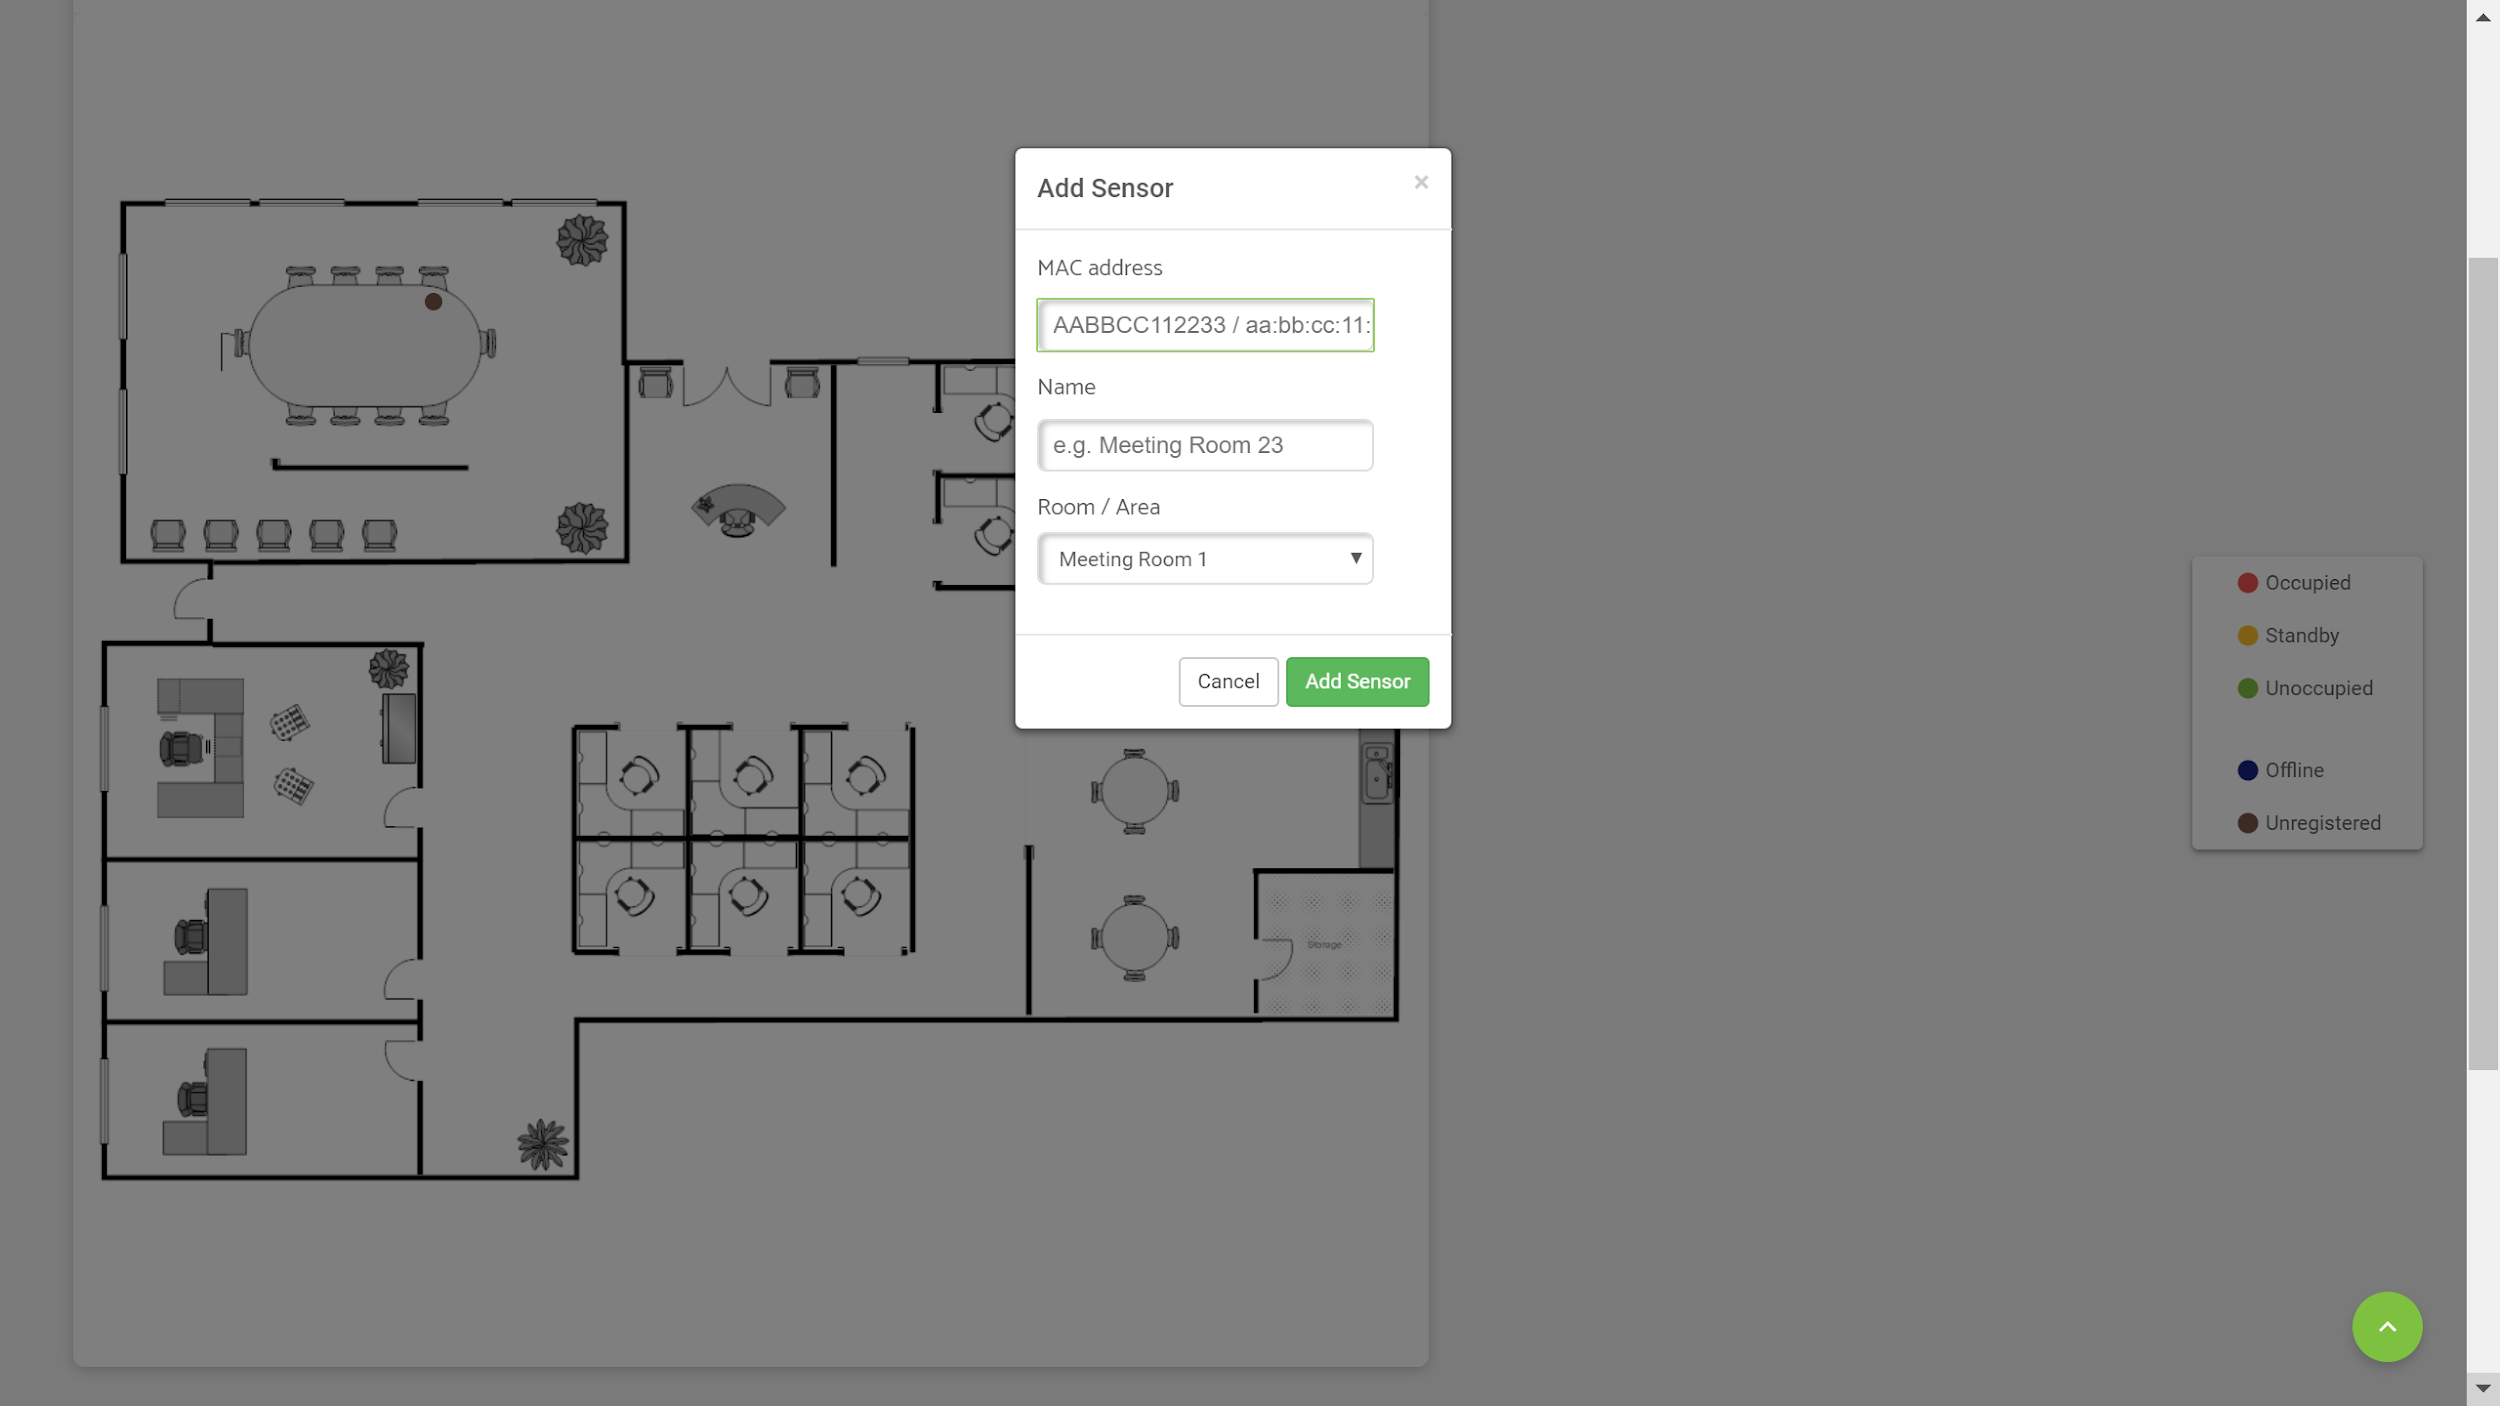 Figure 2 - Add Sensor
Step 2 – Locate a suitable position
The acceptable distance from the front to Senzo-U is in 10 – 40 cm (4 – 15 in) range. Ideally, 20 cm (8 in) results in the most reliable data reading. Senzo-U's front should be clear from obstacles and be placed parallel with the desk. 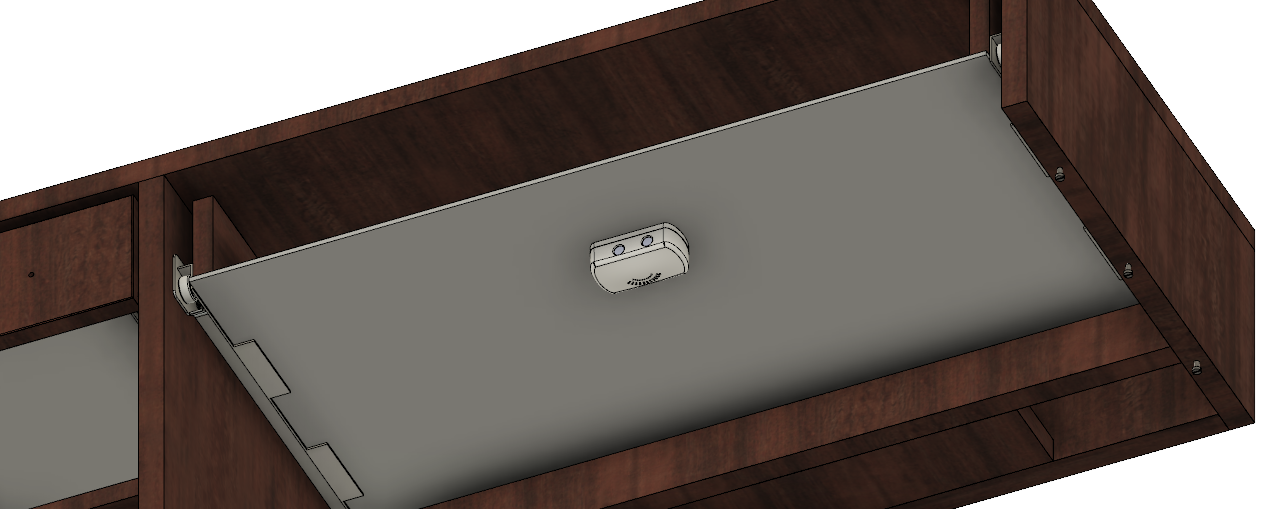
Figure 3 – Location
Step 3 – Mount and secure the Senzo-U
To install
- Apply firm pressure to the Senzo-U with RP45 taped underneath to the desired position.
- Attach Micro USB cable to the Senzo-U and secure with zip tie and anchor provided.
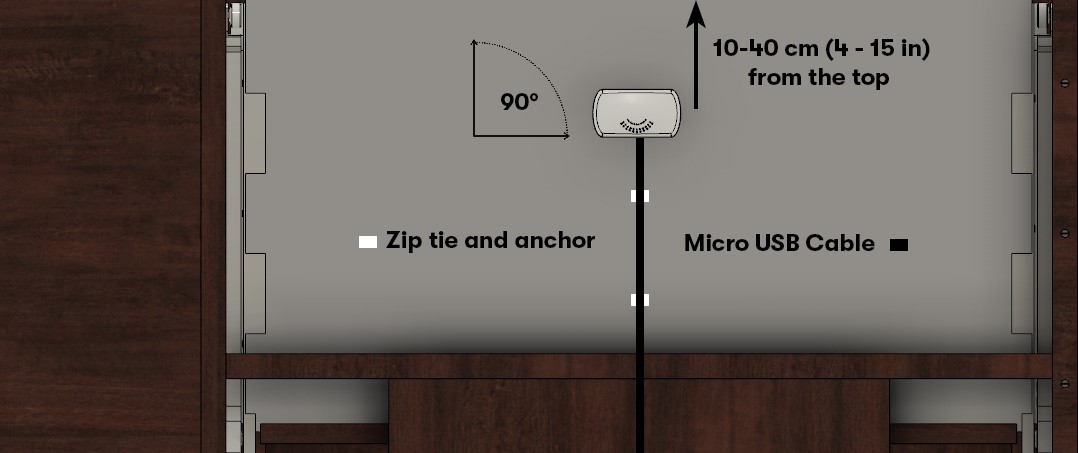
Figure 4 – Mounting
Step 4 – Connect the power
Using the available power socket to install the Wall charger or Power hub. The provided Micro USB cable is either in 2m or 3m (6.5 or 10 ft.) depends on the distance from Senzo-U to a power source. Measuring the length from Senzo-U to a power source before choosing the cable. Remember to leave a few centimeters loose cables unzipped to avoid constrain and stretch.
Multi-port Power hub can power up to 10 Senzo-U simultaneously. Mounting all the Senzo-U securely before plugging in the USB-port.
See Appendix 1 for an example of a completed installation.
Large Installations
This part is applicable for high quantity projects utilizing a 4-man team.
Tools and Materials
Addition to the basic tools listed above:
- 1 x Laptop with Internet access
- 1 x USB Optical barcode scanner
- (Optional) Spare Android/iPhone device for resetting Senzo-U
Step 0 – Dividing the task
The task is divided for 2 teams:
- Team A (2 members): Scanning and adding Senzo-U to SenzoLive
- Team B (2 members): Installing the Senzo-U
Team A – Scanning and adding the SenzoUnit to SenzoLive
Follow step 1 from “Overview of Installation” to scan and add the Senzo-U onto the platform. Once it is done, follow steps 2 & 3 from to place the unit.
Team B – Installing the SenzoUnit
Follow step 4 from “Overview of Installation” to connect power source for the Senzo-U.
Step 2 – Maintenance Review
At the end of the installation, open SenzoLive Software, click on the live floor layout, and click on
Maintenance view and address all Blue and brown spots.
Brown dots indicate Senzo-U that has not connected to the site at any time – check power or correct the MAC address.
Blue dots indicate that Senzo-U has connected but are now offline, this may be Wi-Fi coverage and the router needs to be moved to a more central location or the power may have been disconnected.
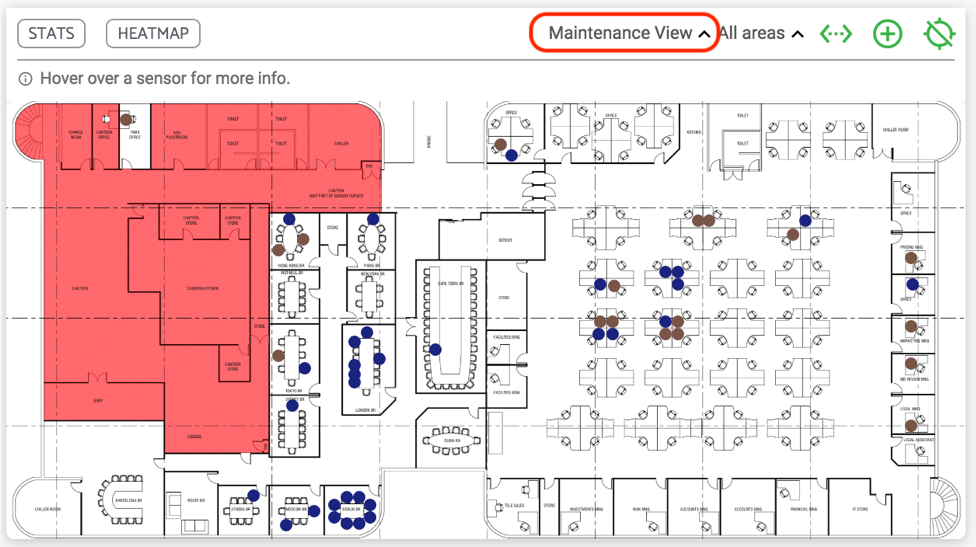
Figure 5 – Maintenance View
Troubleshooting
Resetting the SenzoUnit is done when the sensor is unresponsive. It is done using an iOS or Android mobile device.
Soft Reset SenzoUnit: press and hold the configuration button with a paper clip for 10 seconds until the LED blinks green. Then turn the power off and on.
Hard Reset SenzoUnit: by pressing the configuration button with a paper clip for 10 seconds until the LED blinks green.
- While the sensor is in configuration mode, it will show a Wi-Fi network named “SenzoLive-MAC Address” on the mobile device.
- Connect to the network with password “senzo”. (Android devices from version 6 will display a message ‘This network has no internet access, stay connected?’ Always select ‘Yes’)
- After connecting to the SenzoUnit, the LED will blink green rapidly. Open Safari, Chrome or Firefox internet browser and type the following address http://192.168.0.1
- The following configuration screen appears, insert the new network information (SSID and Password) if required. The server address, port, and passphrase are automatically filled.
- After “Save”, the LED switches off and the following line is shown on the website: “Configuration saved, resuming operative mode” indicates completed process.
Appendix
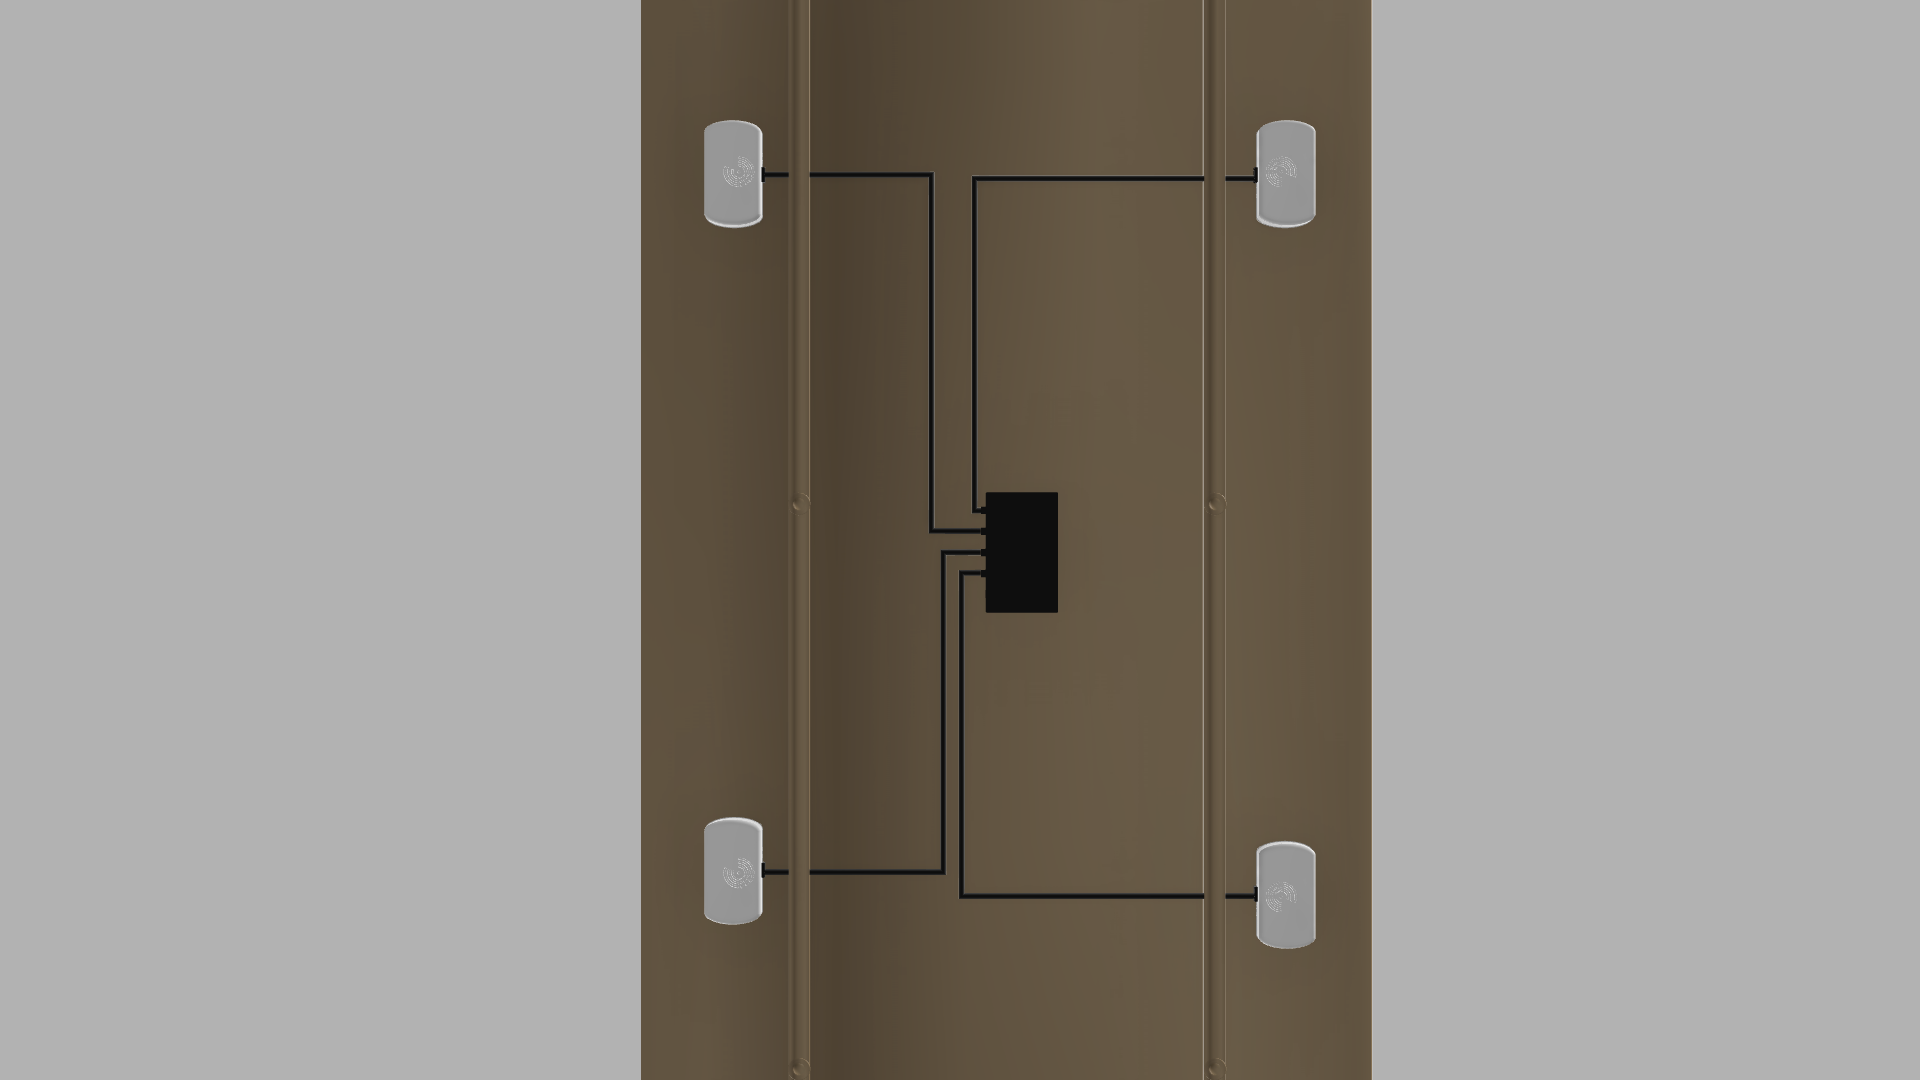
Appendix 1 – Meeting room installation example
Front view
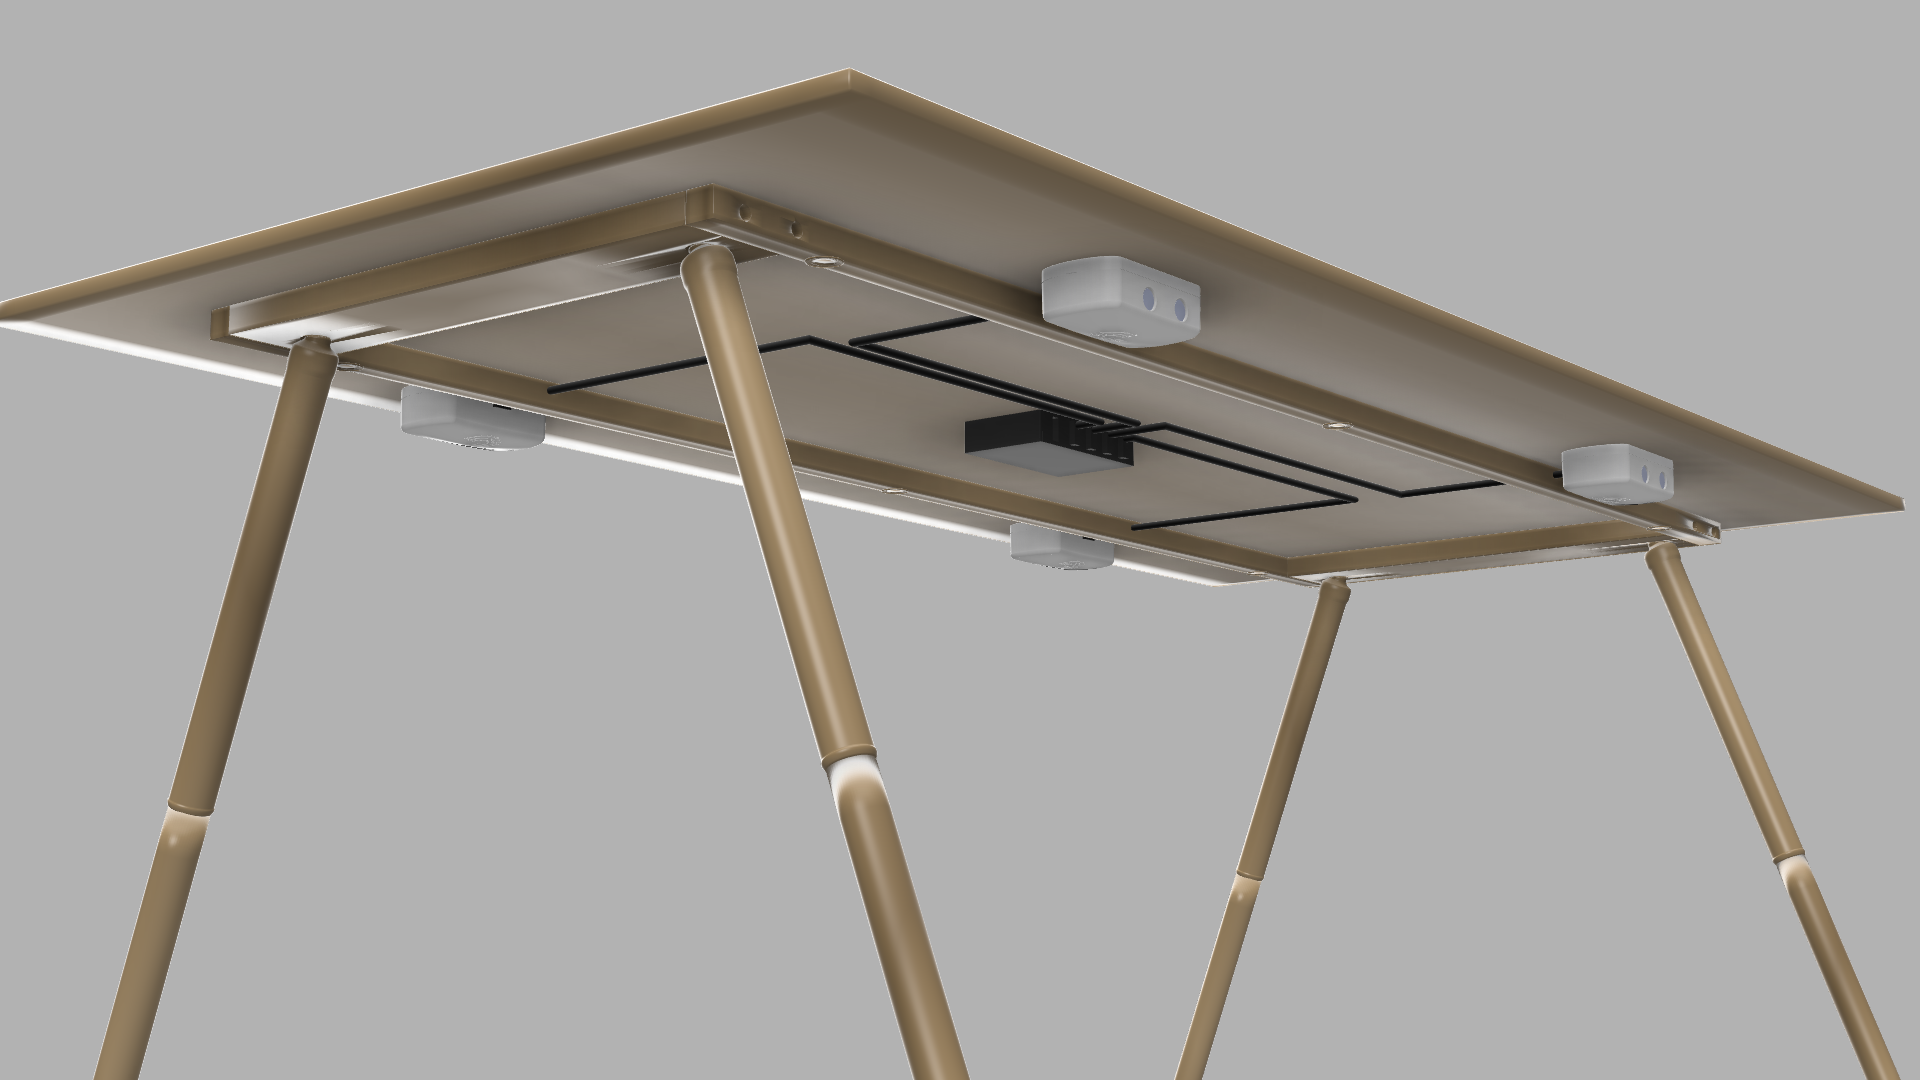
Bottom view
Copyright Steerpath. All rights reserved.
Comments
0 comments
Please sign in to leave a comment.