Map Maintenance
If you have maps provided by Steerpath you can maintain and edit them in the Maps tab. Please note that building editing is done from the Info tab.
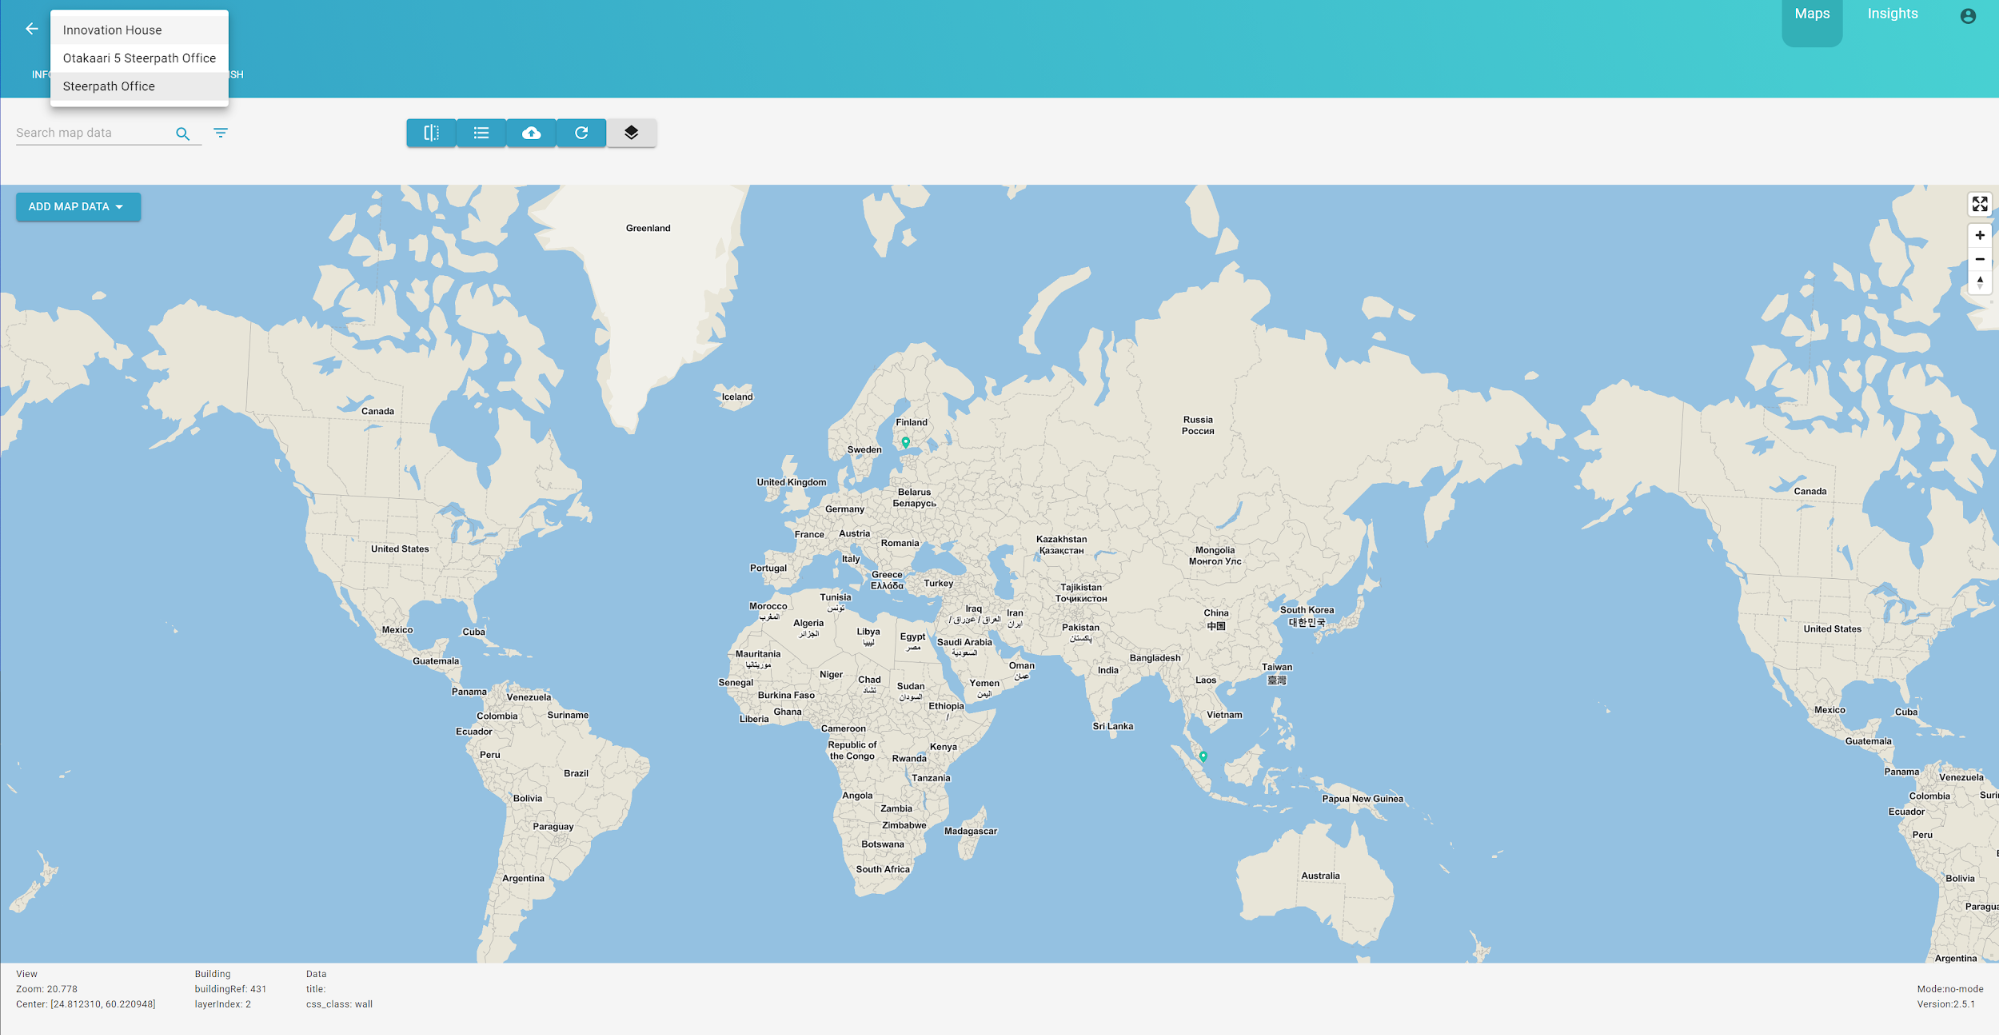
You can fly to your building by selecting the building from the menu dropdown list as shown below.
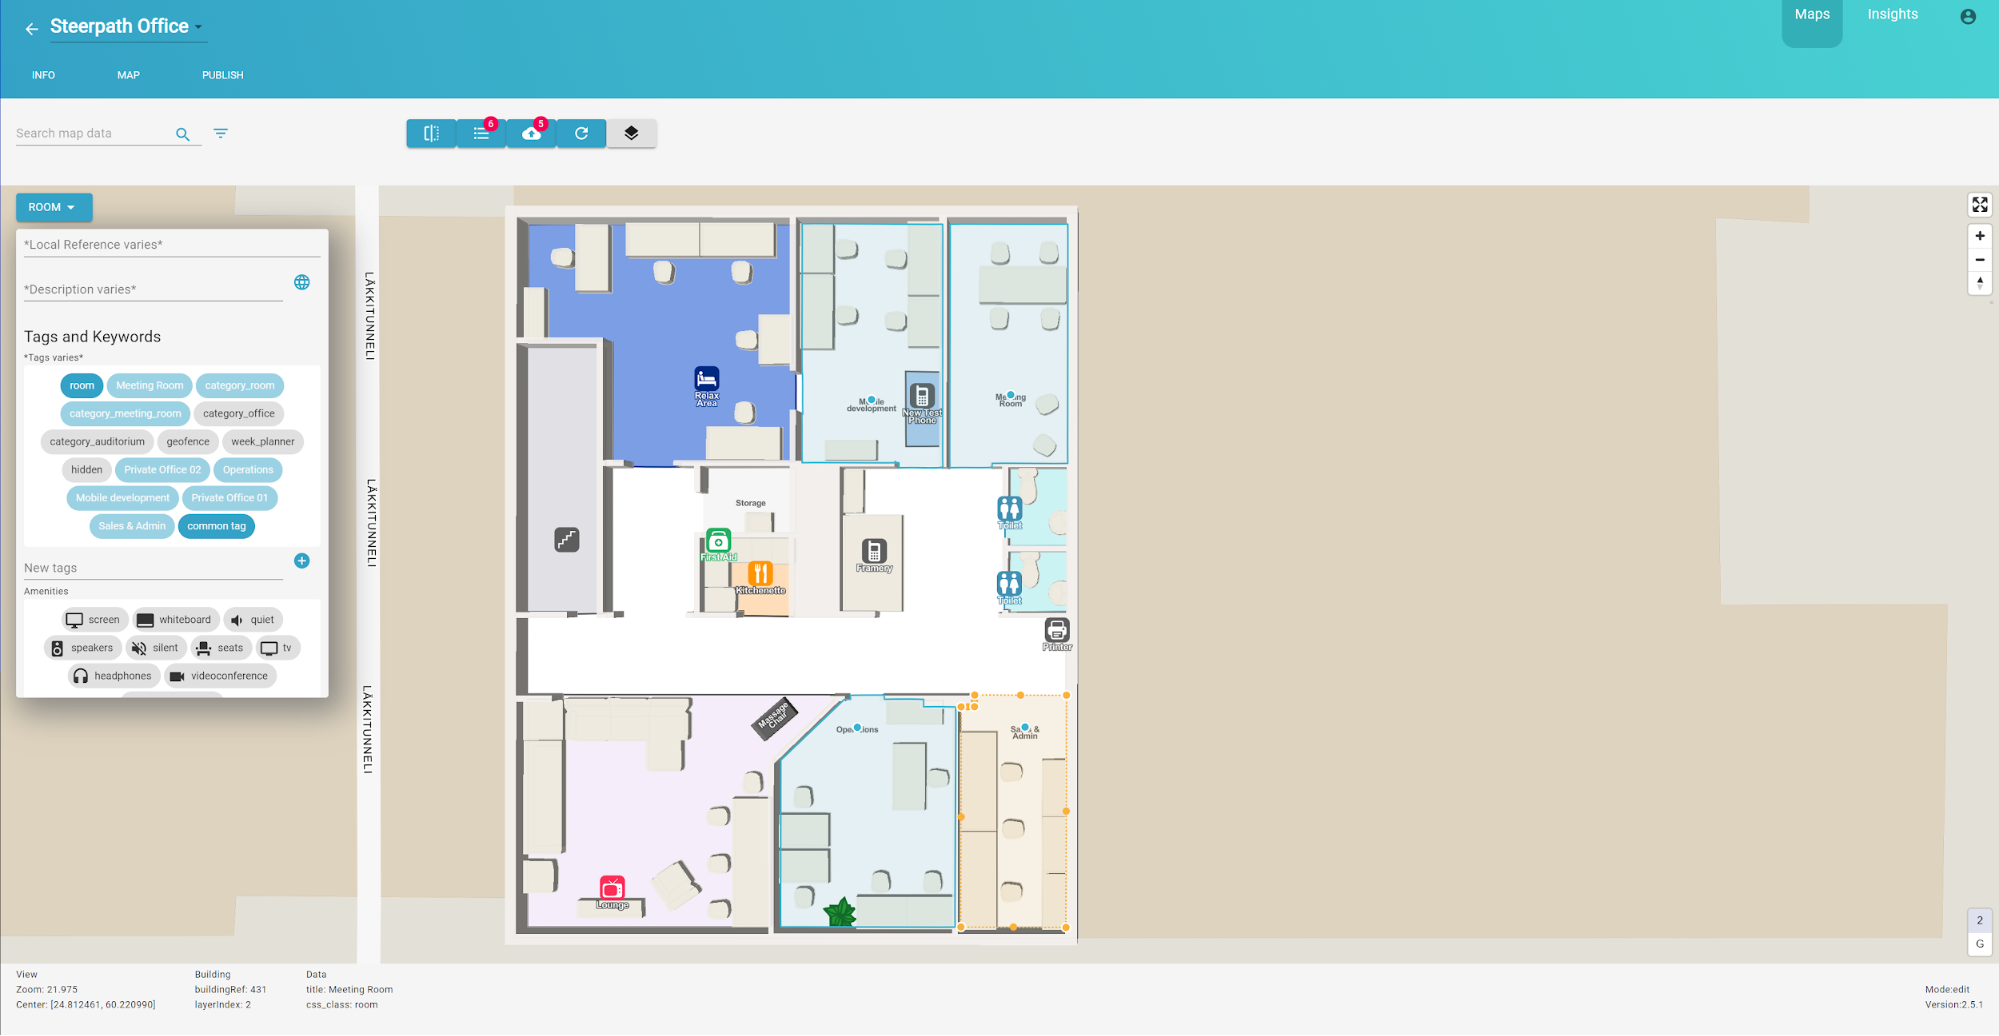
Map Editor Components
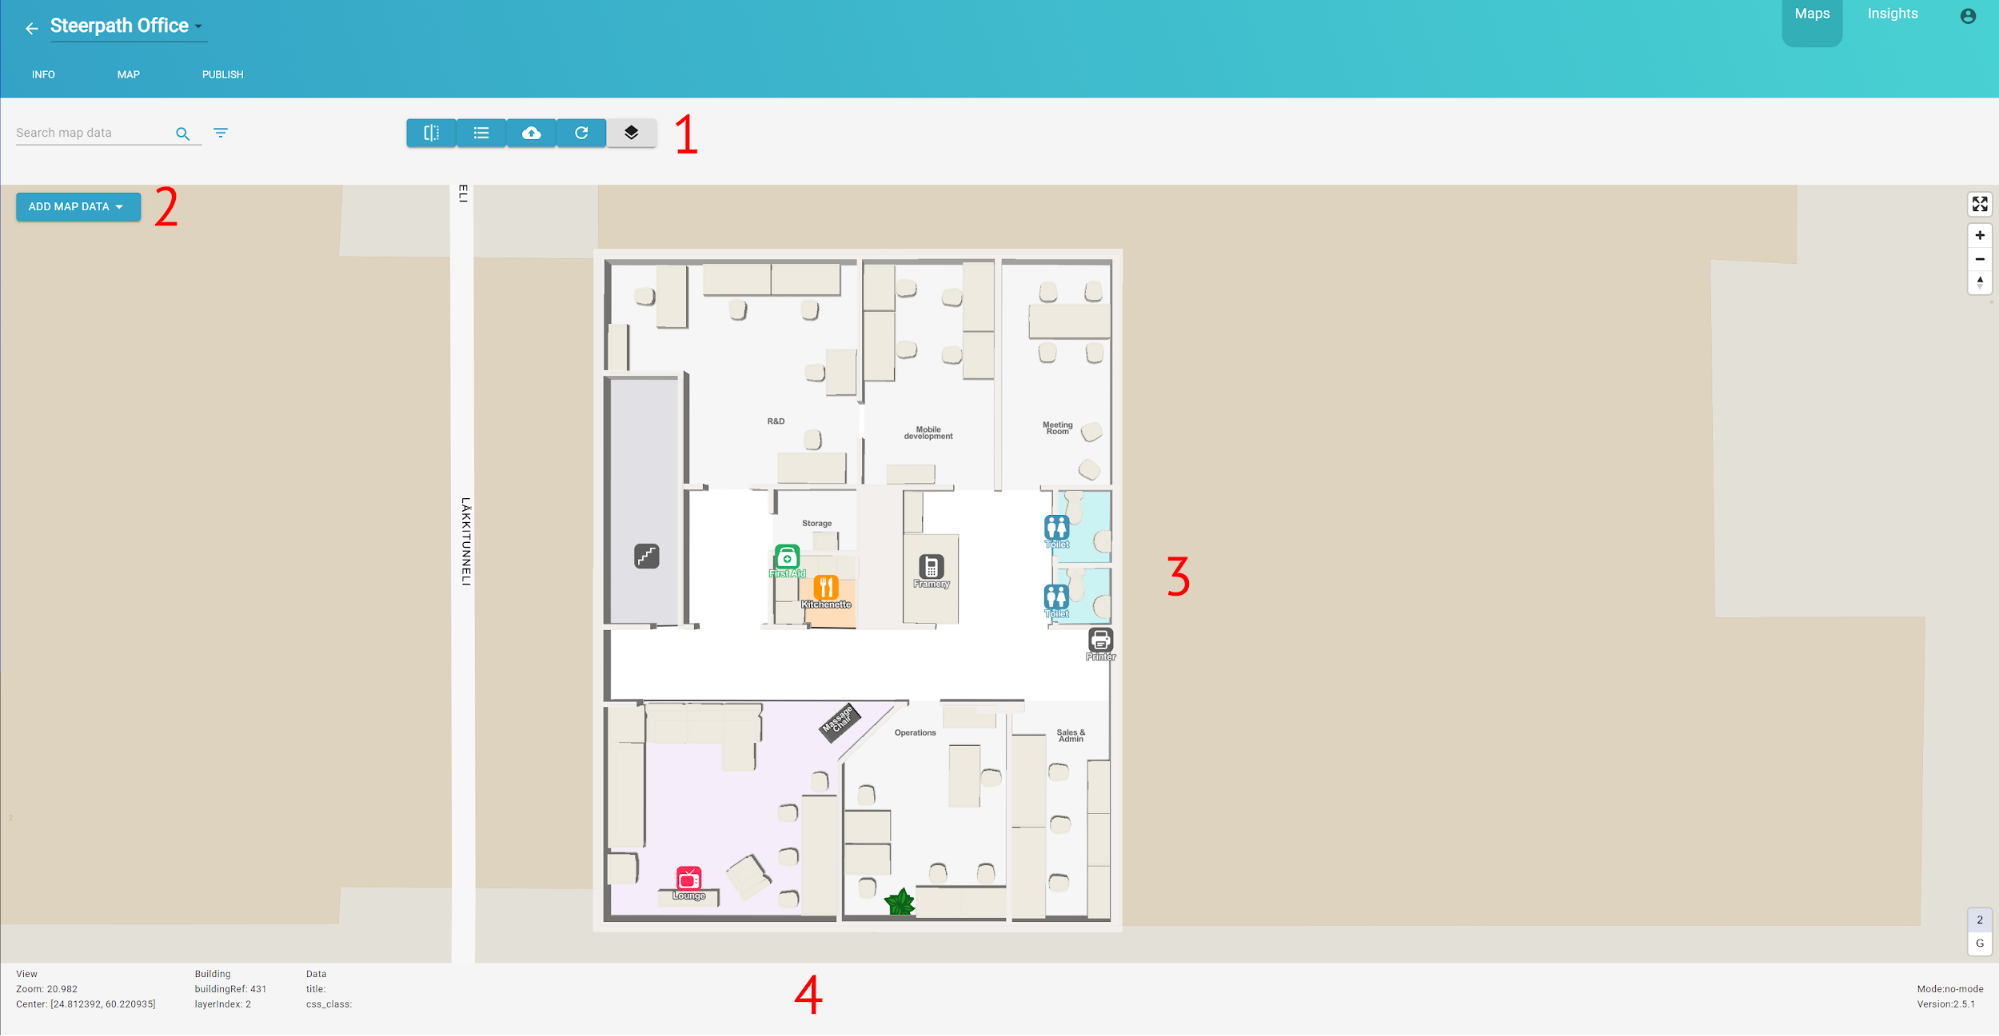
Map editor consists of four different elements:
- Top Bar from which you can manage your editing session.
- Sidebar from which you can edit POI attributes / properties
- Map from which you can edit POI geometry
- Footer which provides information of the current view and selection
In this chapter we’ll explain the roles and features of each component by going through the basic editing process.
Editing Process
Adding new data
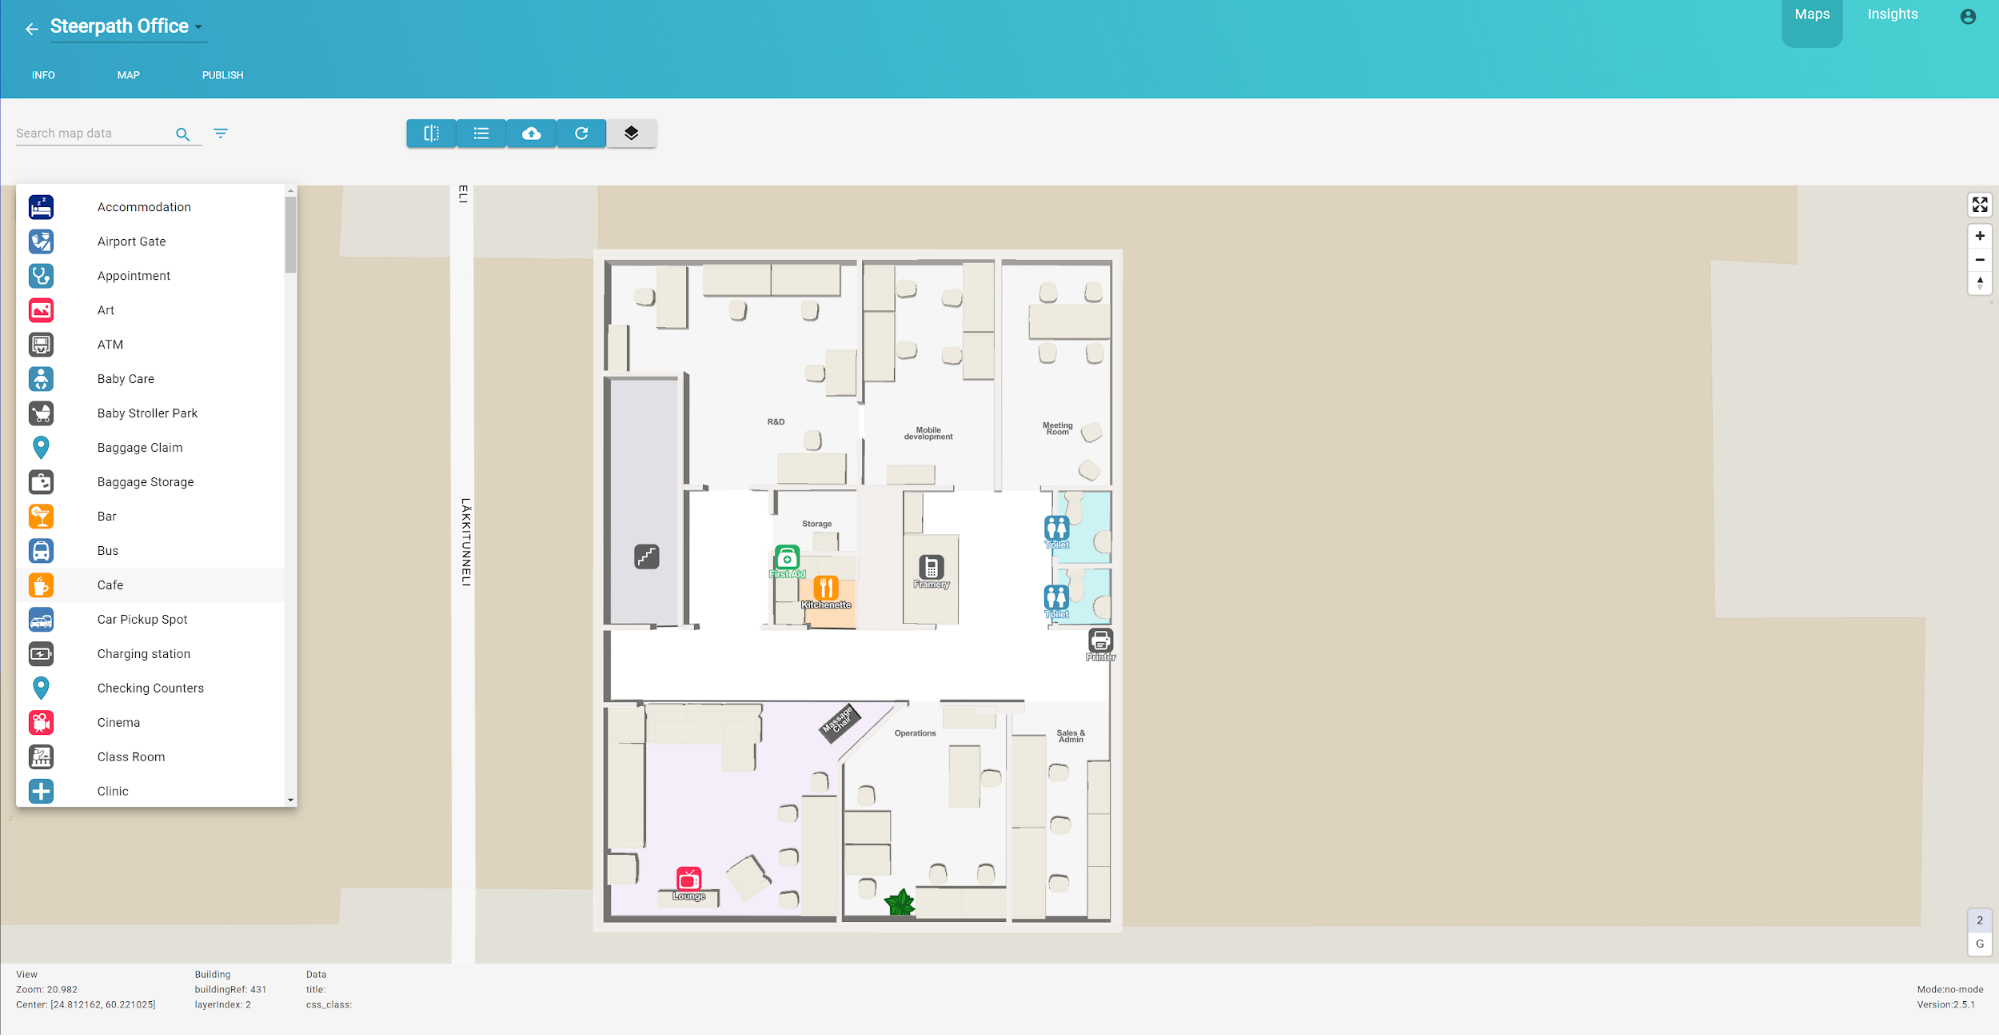
Adding new data is pretty straight forward. Click “ADD MAP DATA” from the sidebar and select which type of POI you want to add. In this example we’ll be creating a Phone POI to our mobile development room.
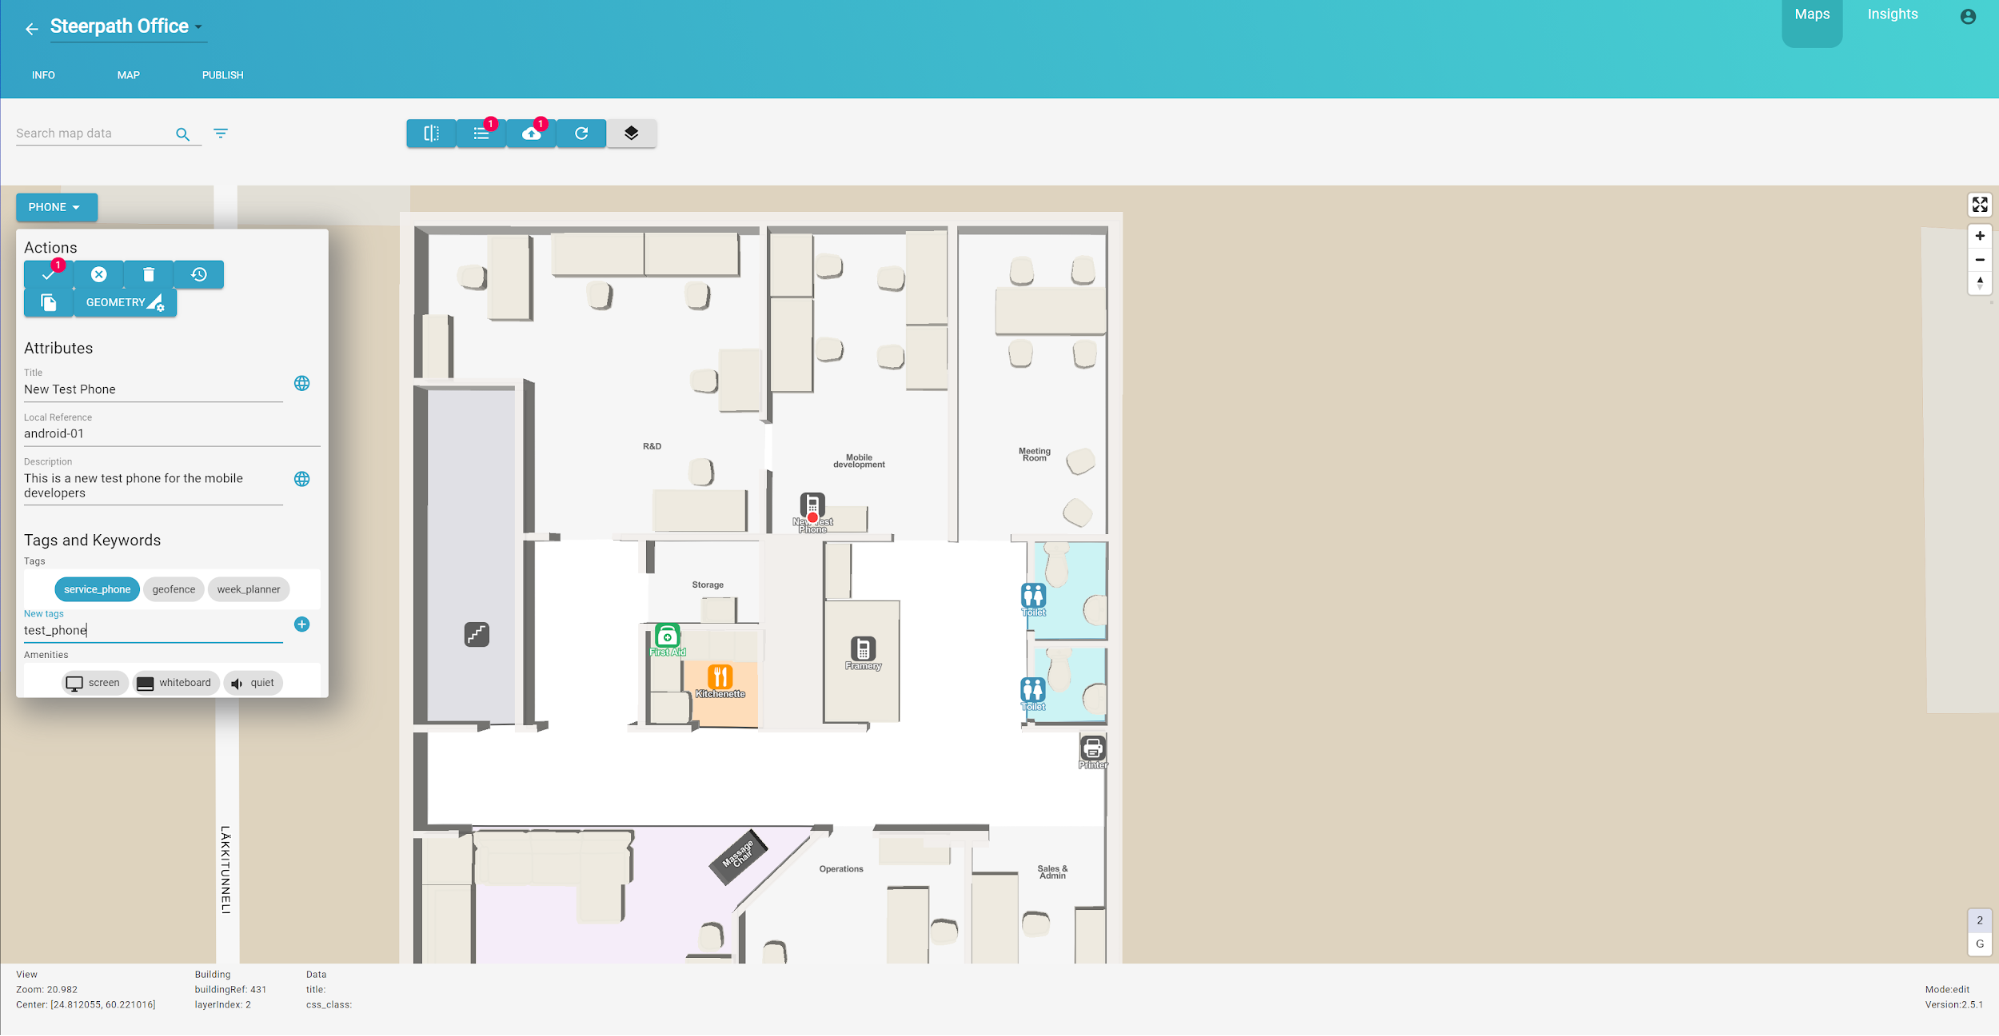
After selecting the POI type from the menu it will appear to the center of the Map. You can change its location by dragging the red circle (vertex) on the map.

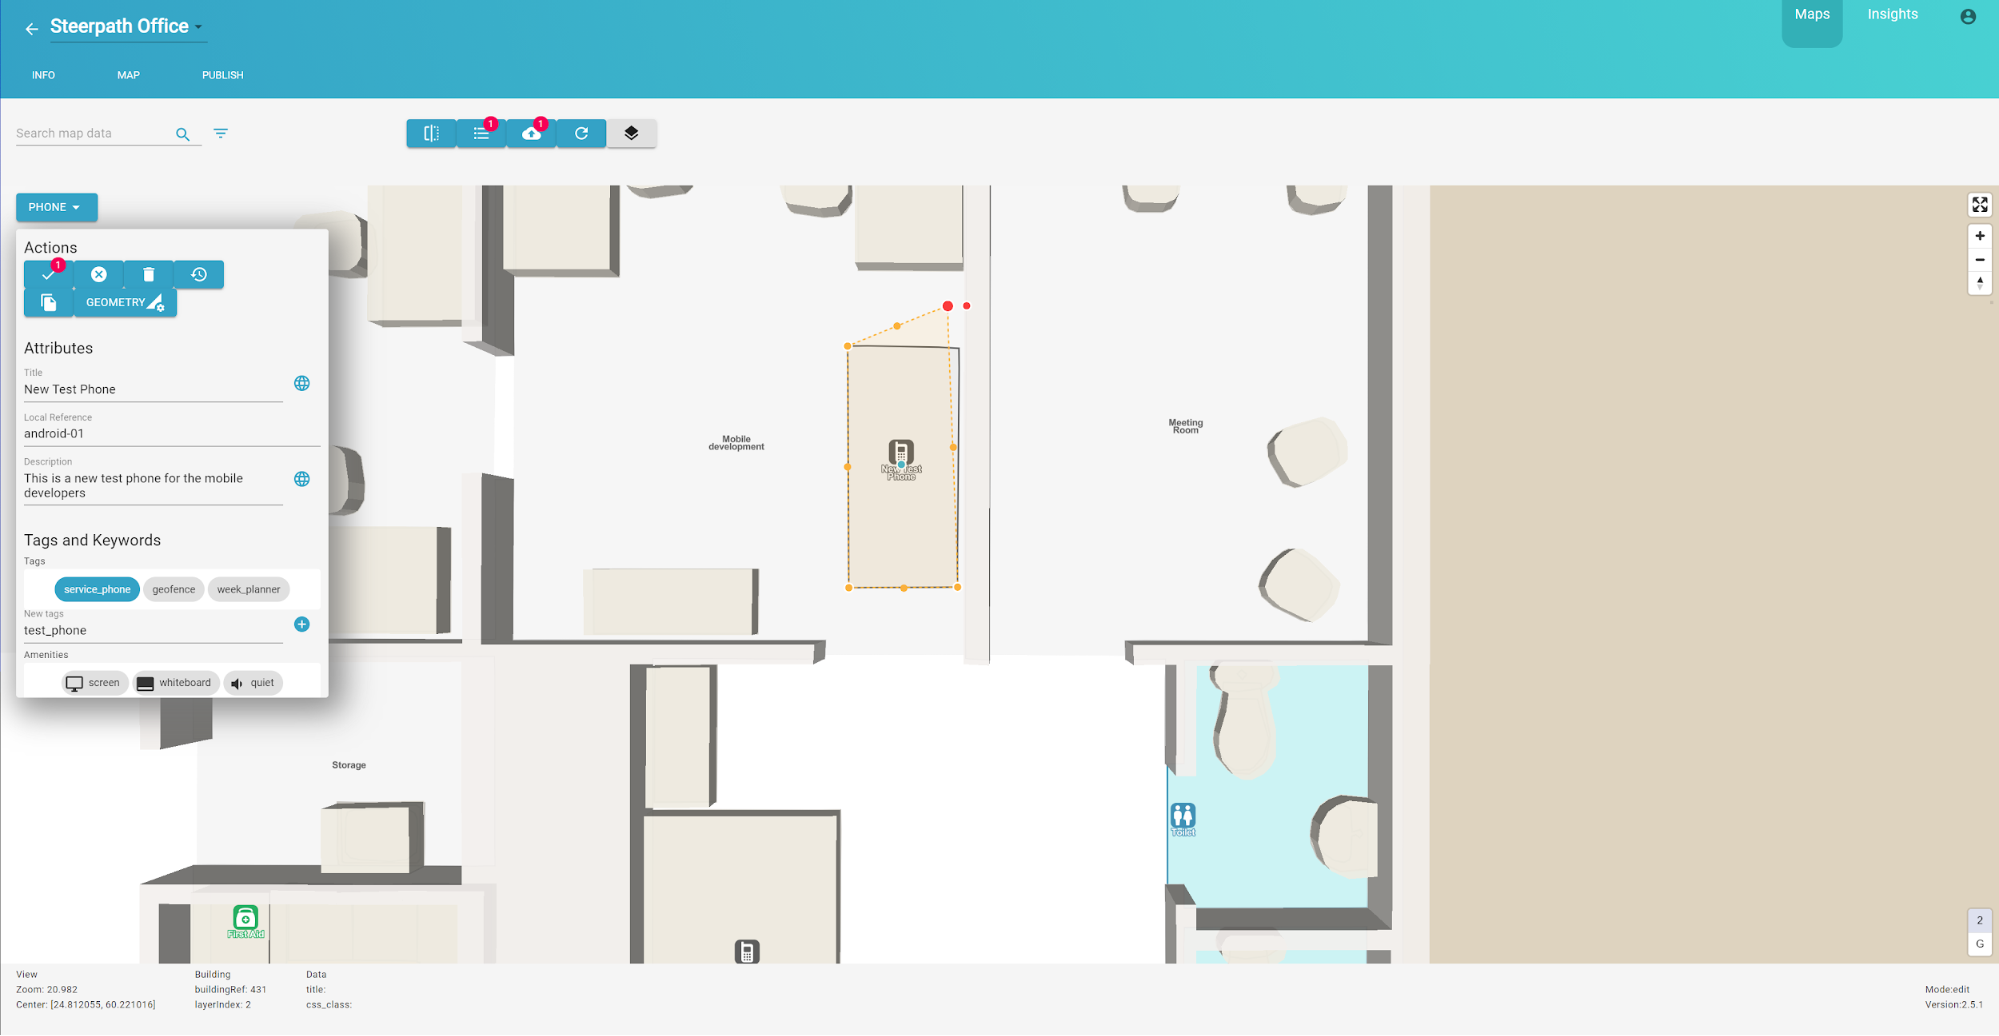
Attribute Editing
As you may have noticed a lot of different attributes appeared to the Sidebar. Some attributes affect the visual appearance of the POI while others can be used for search and other Steerpath SDK functionalities. Here’s an example of edited POI.
To learn more about how different properties can be used with Steerpath maps and SDKs you can contact our support team: support@steerpath.com. Here’s a summary table of the most common editable properties:
|
Title |
POI title which will be visible in the map as well. |
|
Local Reference |
Local reference can be used for distinguishing the same type of POIs from each other. In our systems this attribute can also be used for combining POI data with other external data. Please contact our support to know more about integrating our data with 3rd parties. |
|
Description |
You can give your POI a description which can be used when searching POIs. |
|
Tags |
Tags will help you to find and categorize your POIs. When you have multiple POIs you can configure how they can be searched with tags. |
|
Amenities |
TBA |
|
Keywords |
TBA |
|
Styling |
You can style your POI from the Styling menu. You can change POI area and outline colours as well as text and text halo colour. |
|
Overlay |
From overlay you can add an additional small informative icon on top of your existing POI icon. For example adding an access control overlay will add a small lock on top of yourPOI icon. |
|
Extrusion Type |
You can add extrusion to any POI with area. This will make it pop out of the map with 3D effect. From Extrusion Type selection you can choose how high this 3D will be. |
|
Integrations |
This is where you can add your integration attributes for booking systems or occupancy sensors. More detailed explanation will be included later in this guide |
|
Add new attribute |
You can add your own custom attributes to any POI. |
Geometry Editing
In the top of the Sidebar there’s a button from which you can manage the geometry of your created POI. By clicking “MANAGE GEOMETRY” you can start drawing polygon area to your POI.

When you click the Draw Area your mouse cursor should change. By clicking to a position in Map a polygon vertex should appear. As you keep on clicking you’ll notice that dashed line will appear between the vertices. When you want to stop drawing just double click (pressing enter key works as well) or return to the first vertex you draw.

You can modify the drawn area by selecting one of the vertices again and by dragging it. When dragging one of the vertices you’ll see a smaller red vertex that will help you to snap the vertex to a wall or corner.
If you want you can modify the colour of the drawn area from the Sidebar’s Styling section.

When you’re done with the changes you can confirm your edits by:
- Clicking anywhere on the map
- Pressing enter
- Clicking the “confirm” button at the top of the sidebar.
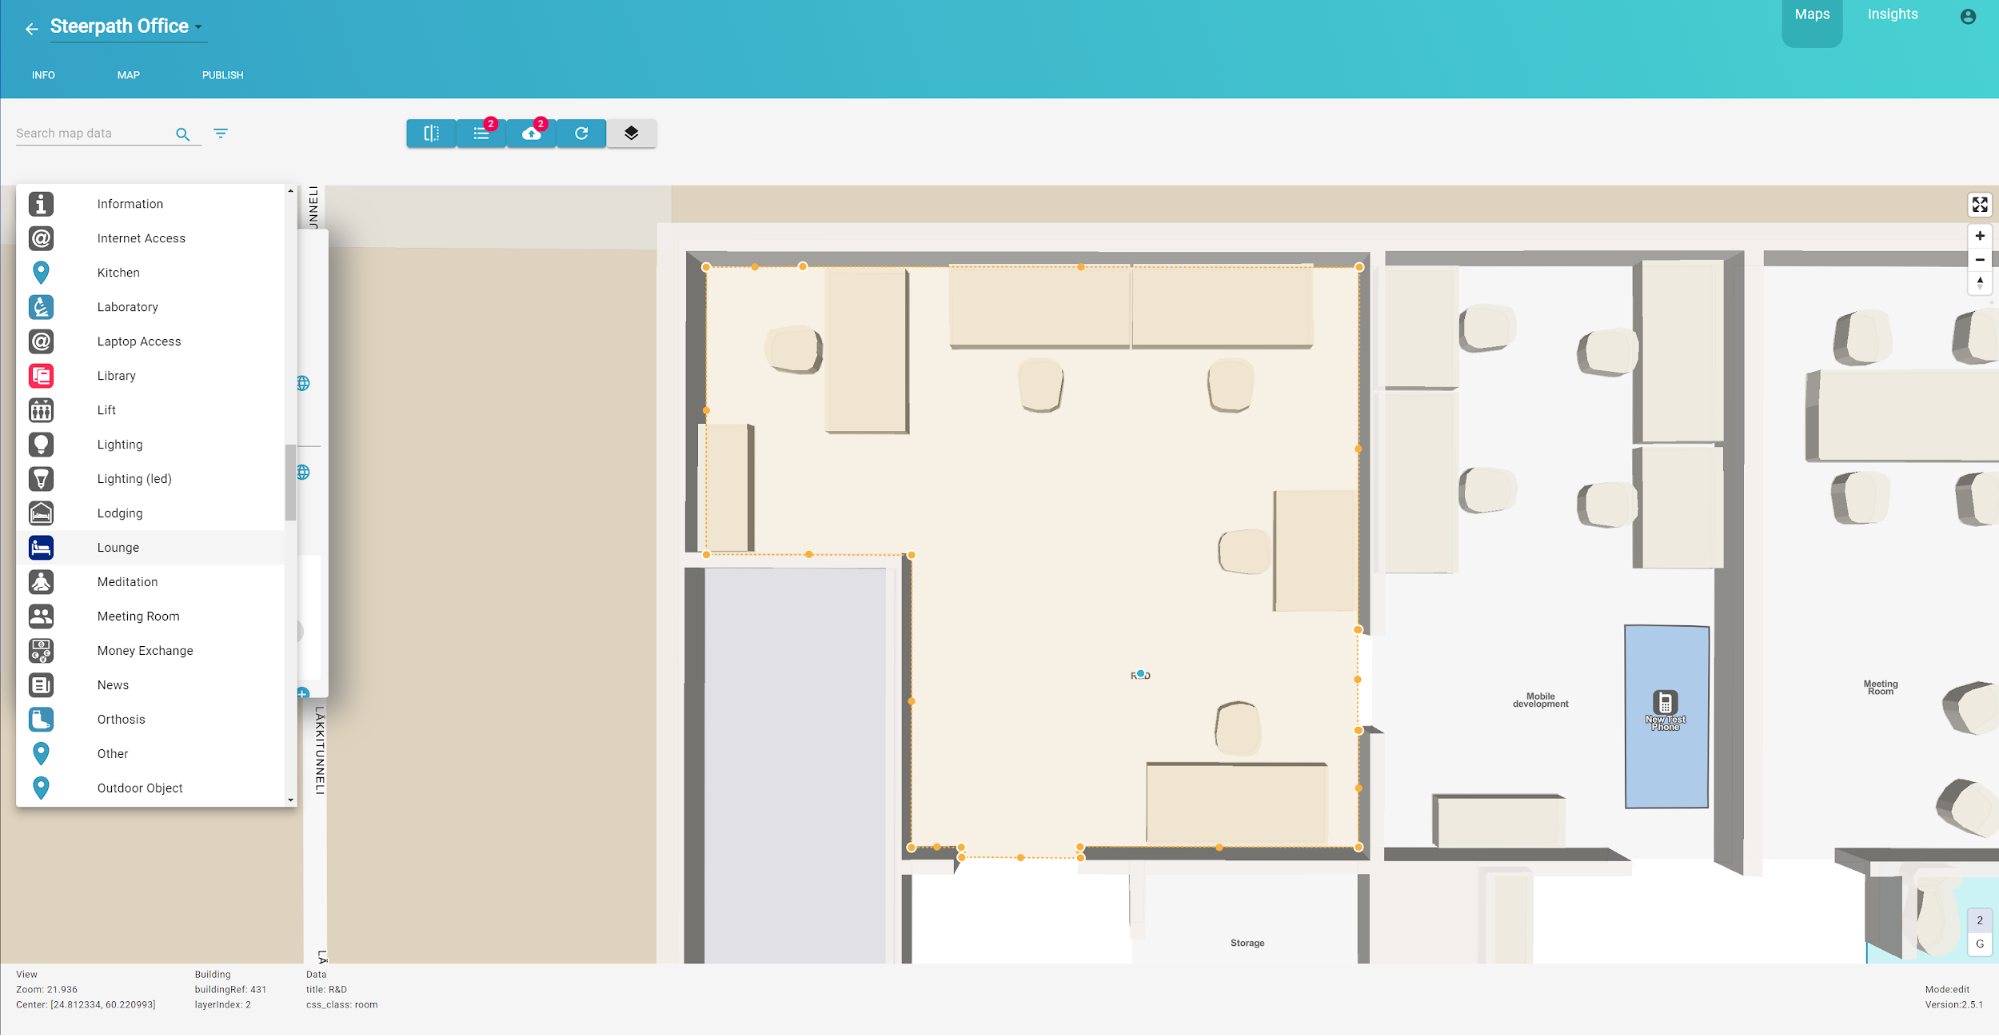
Editing existing data
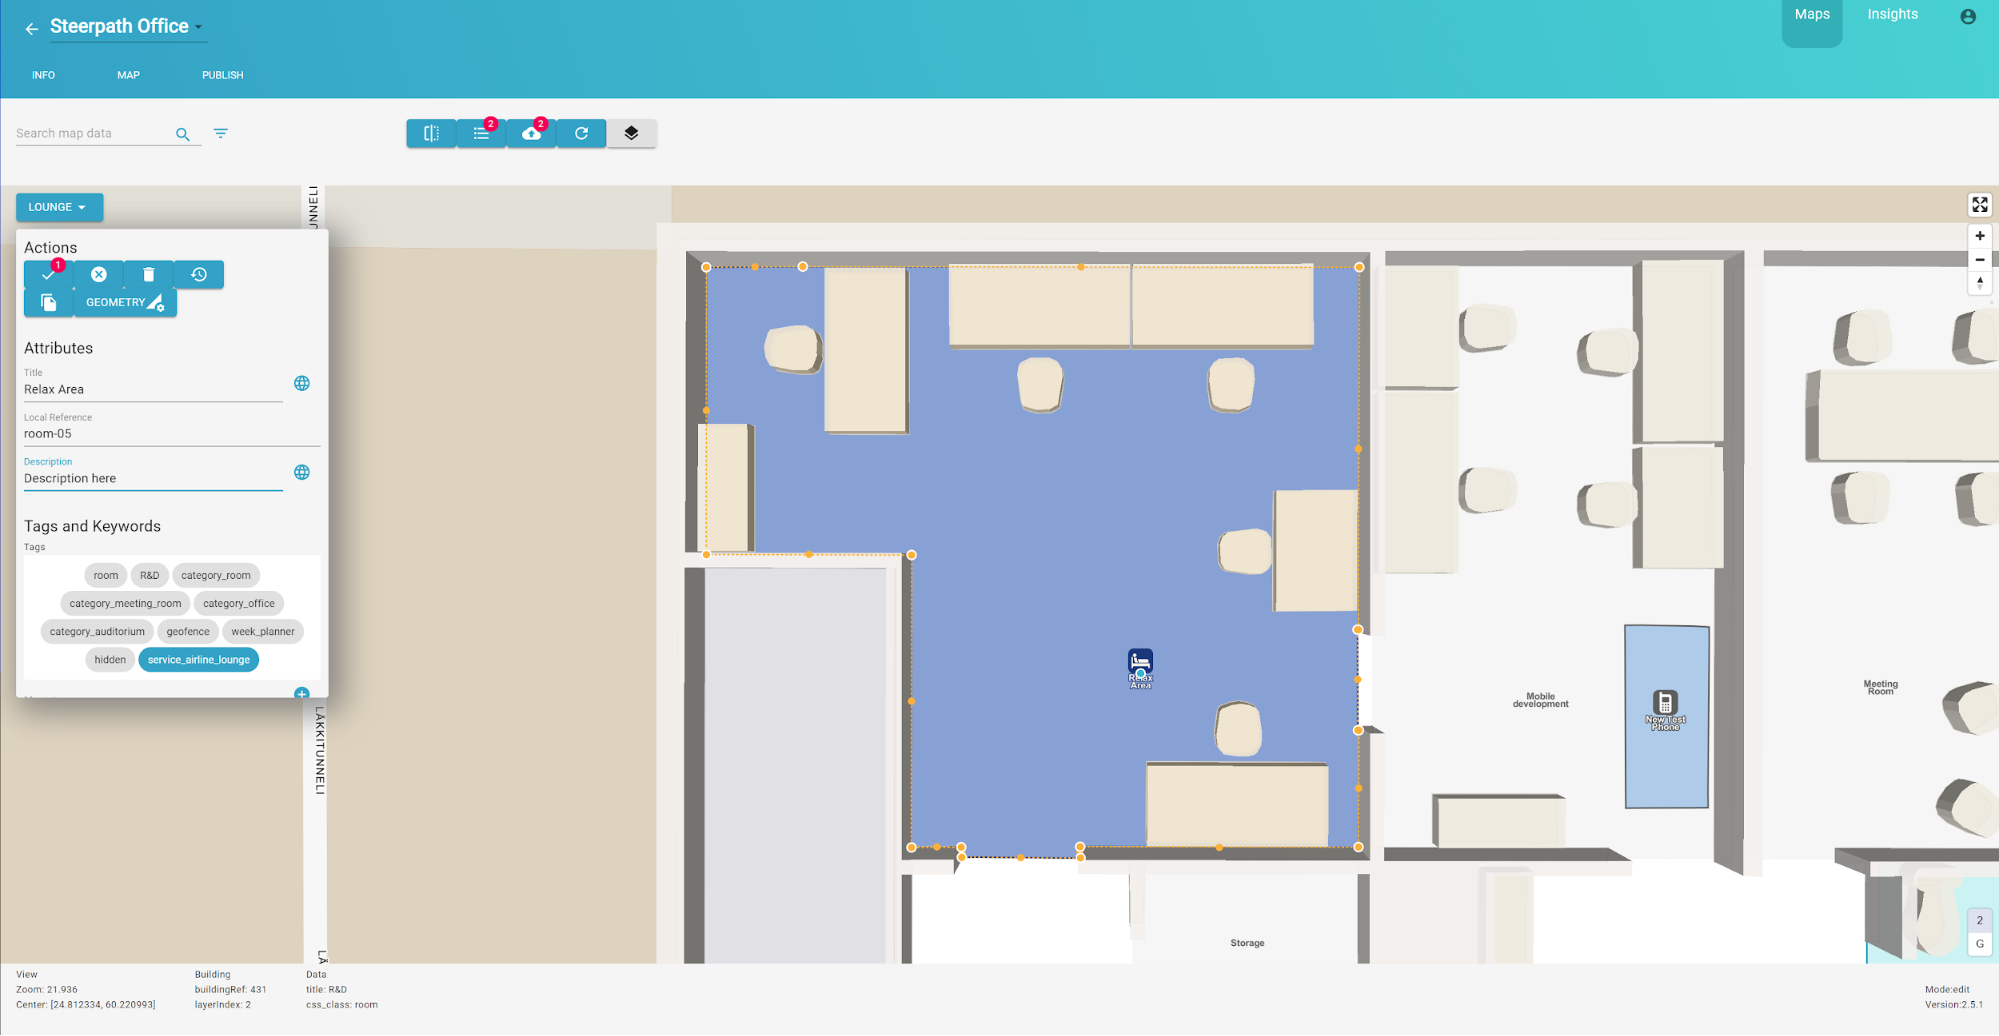
If you want to edit existing data you can do it by clicking existing POI on the map. The Sidebar will be automatically populated with the POI attributes. In this example we will make the R&D room to be a Lounge area. You can switch POI type from the same dropdown menu from which you first added a new POI.
You can edit the attributes and geometry as we did with the first POI created.
Upload
When you’re happy with the changes you upload them to the server from the Top Bar. Before uploading changes to the server you can view your edited POIs from the Top Bars list button. The menu will tell which of the objects are new added ones and which one are modified existing ones.
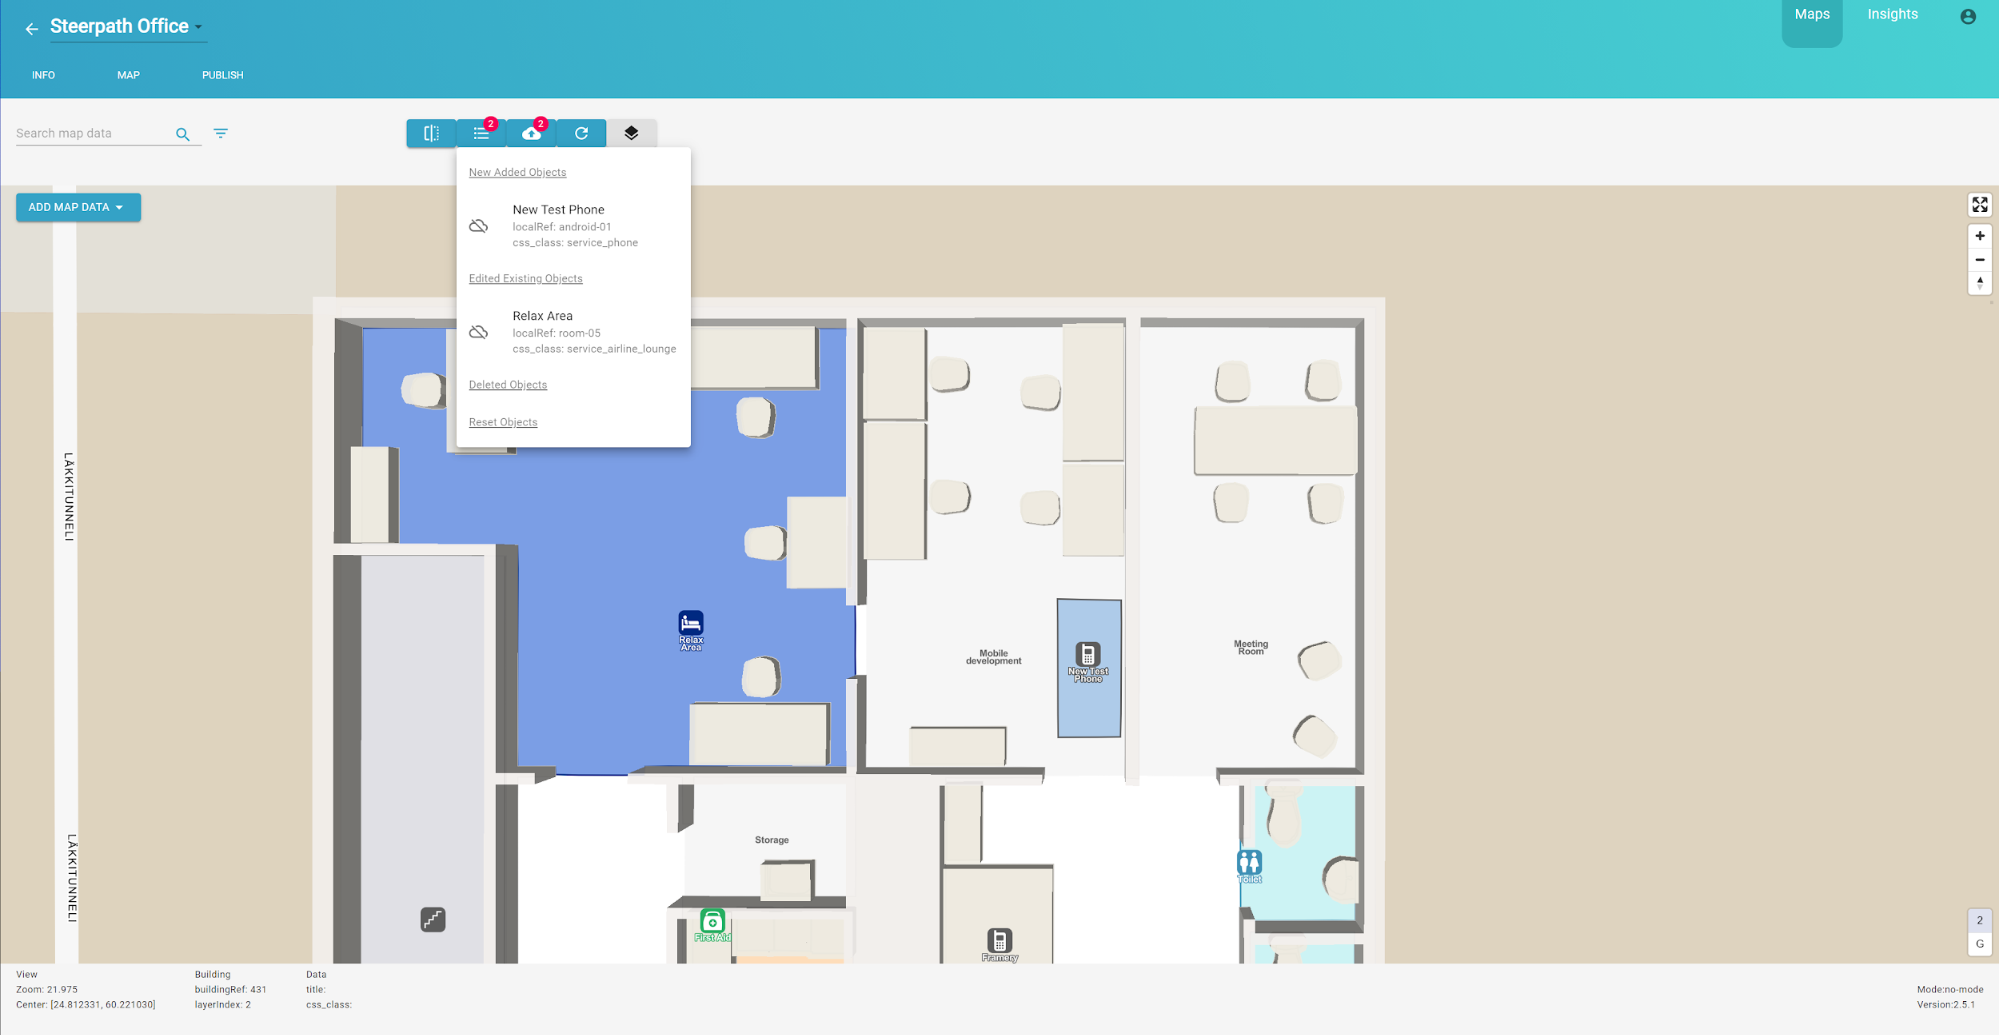
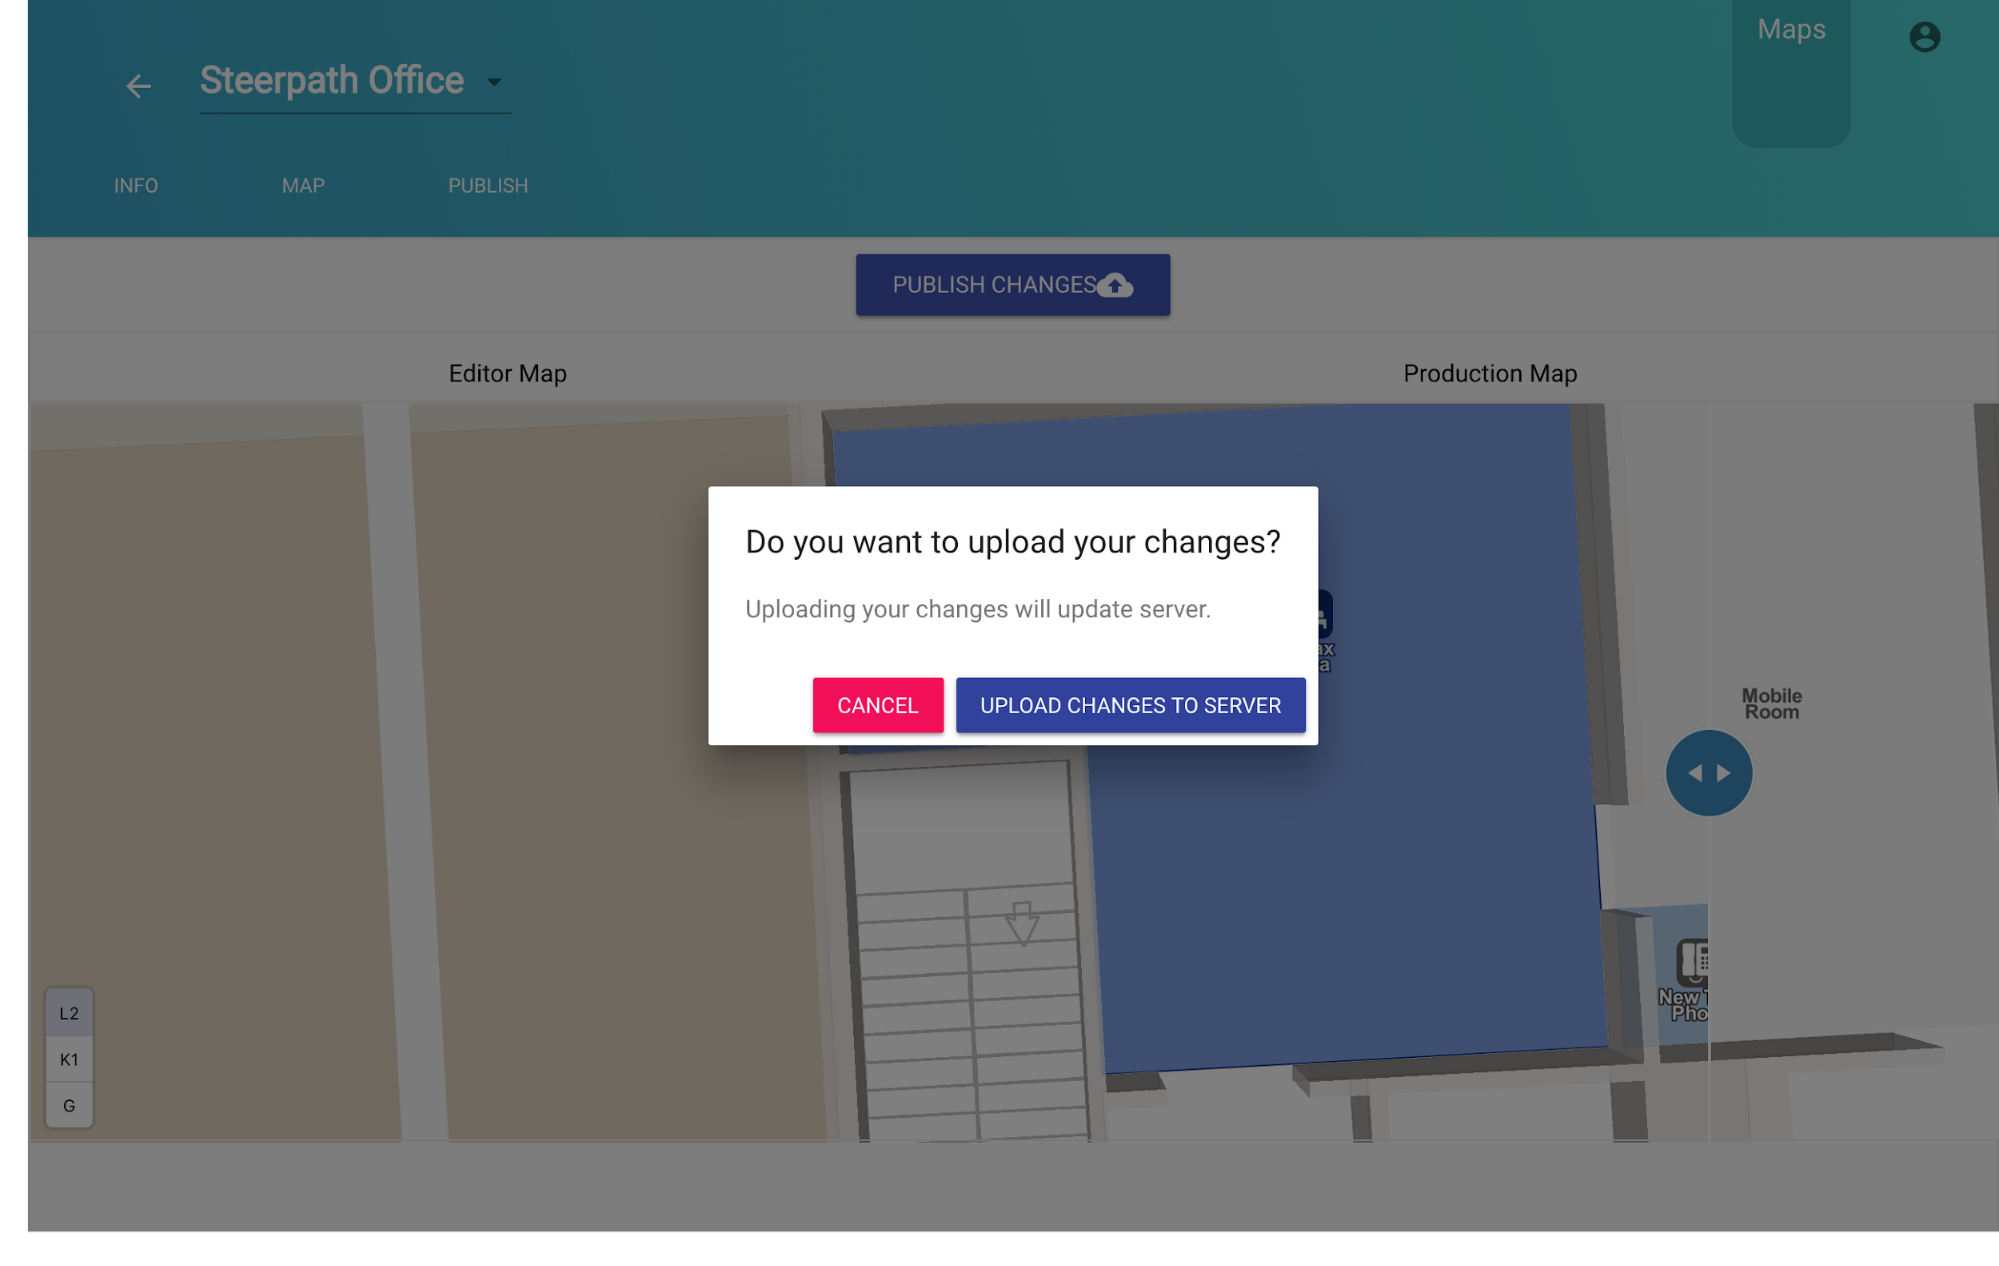
When you want to upload see the button with the cloud and upload icon. Next to it there’s a number indicating how many unsaved changes you currently have. Clicking the upload button there will be confirmation dialog.
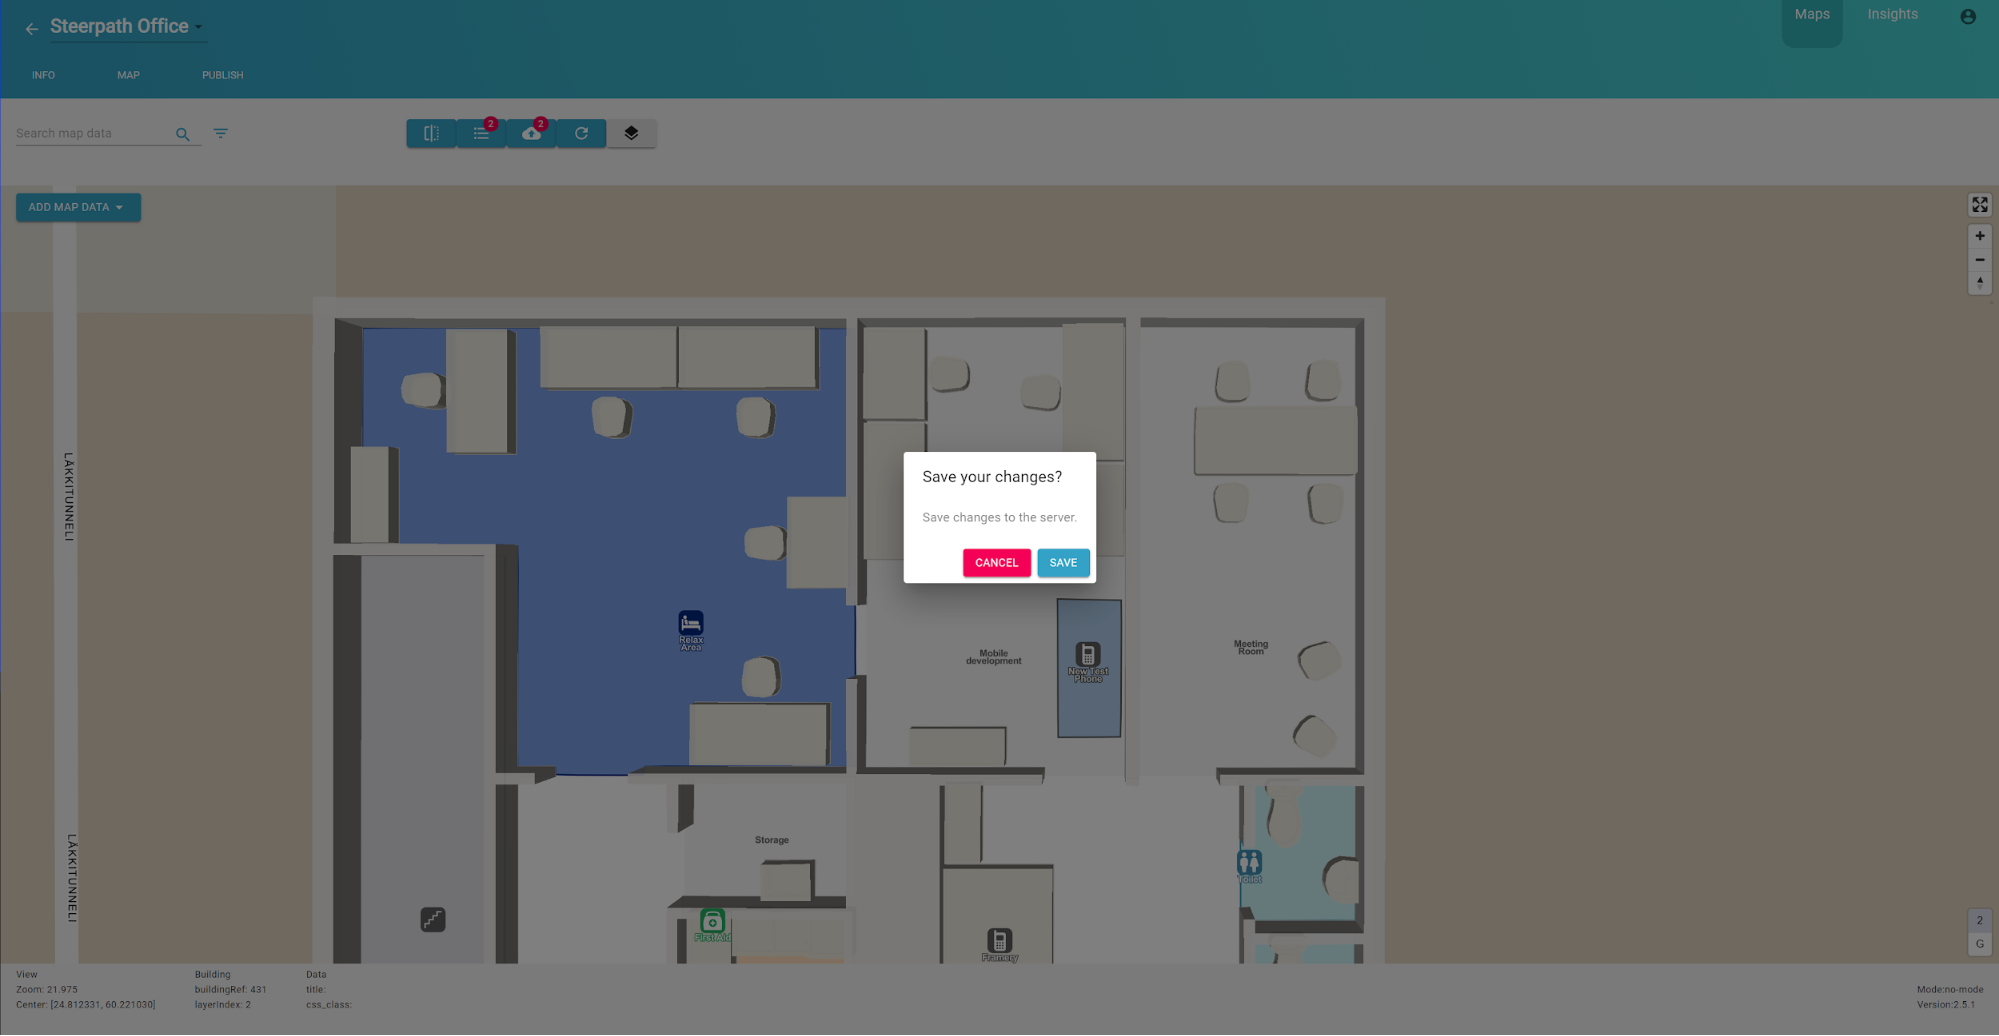
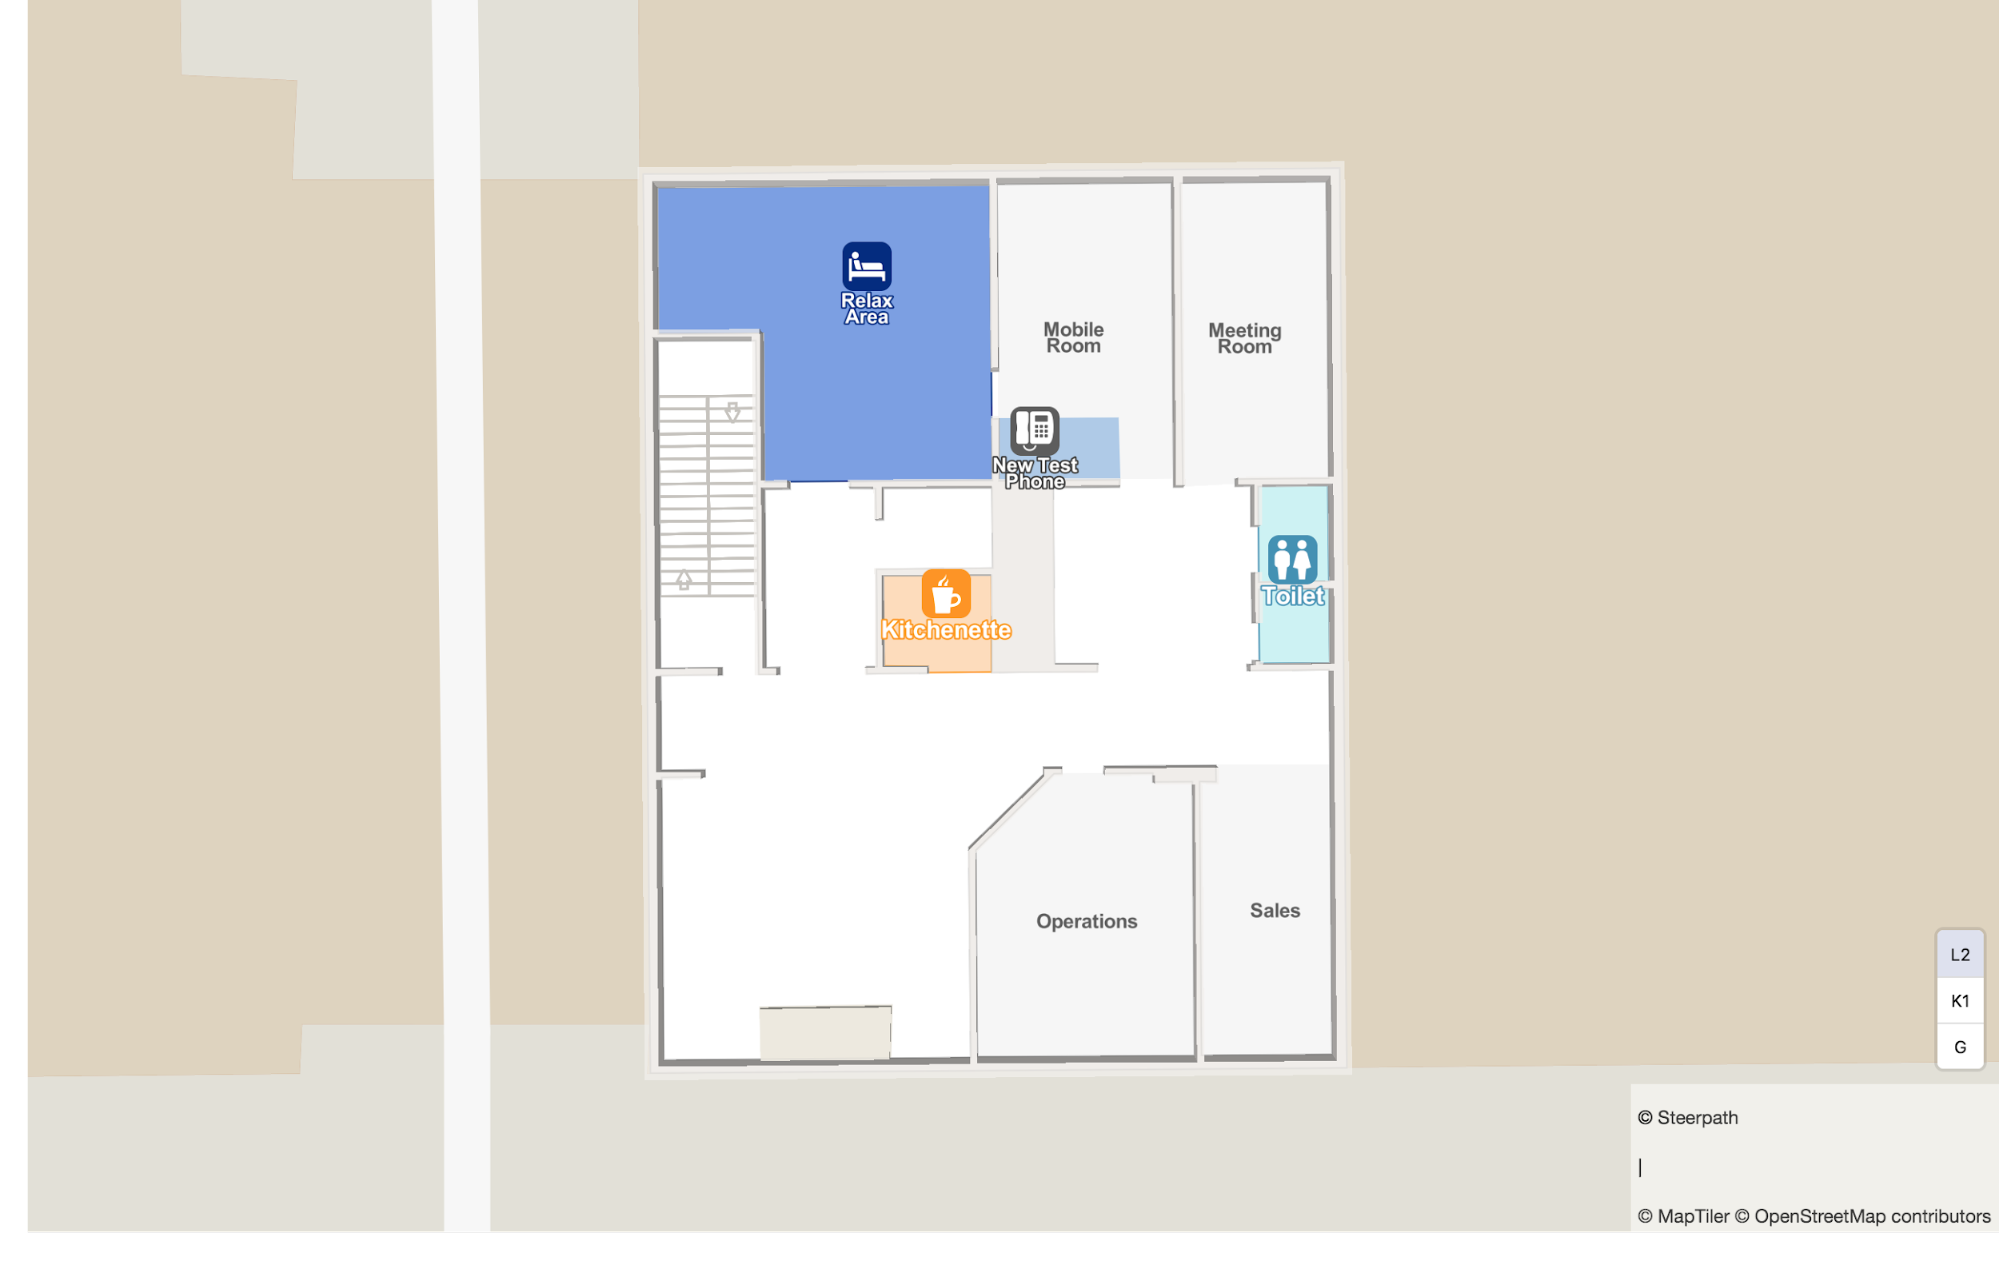
Please note that when you save the application will start your tile generation automatically but it may take a while to see the changes. You can refresh the map view from the Top Bar’s refresh button. As you can see in this image we can see that the tiles have been generated and the upload status has changed in the list menu.

Supported Features
Search
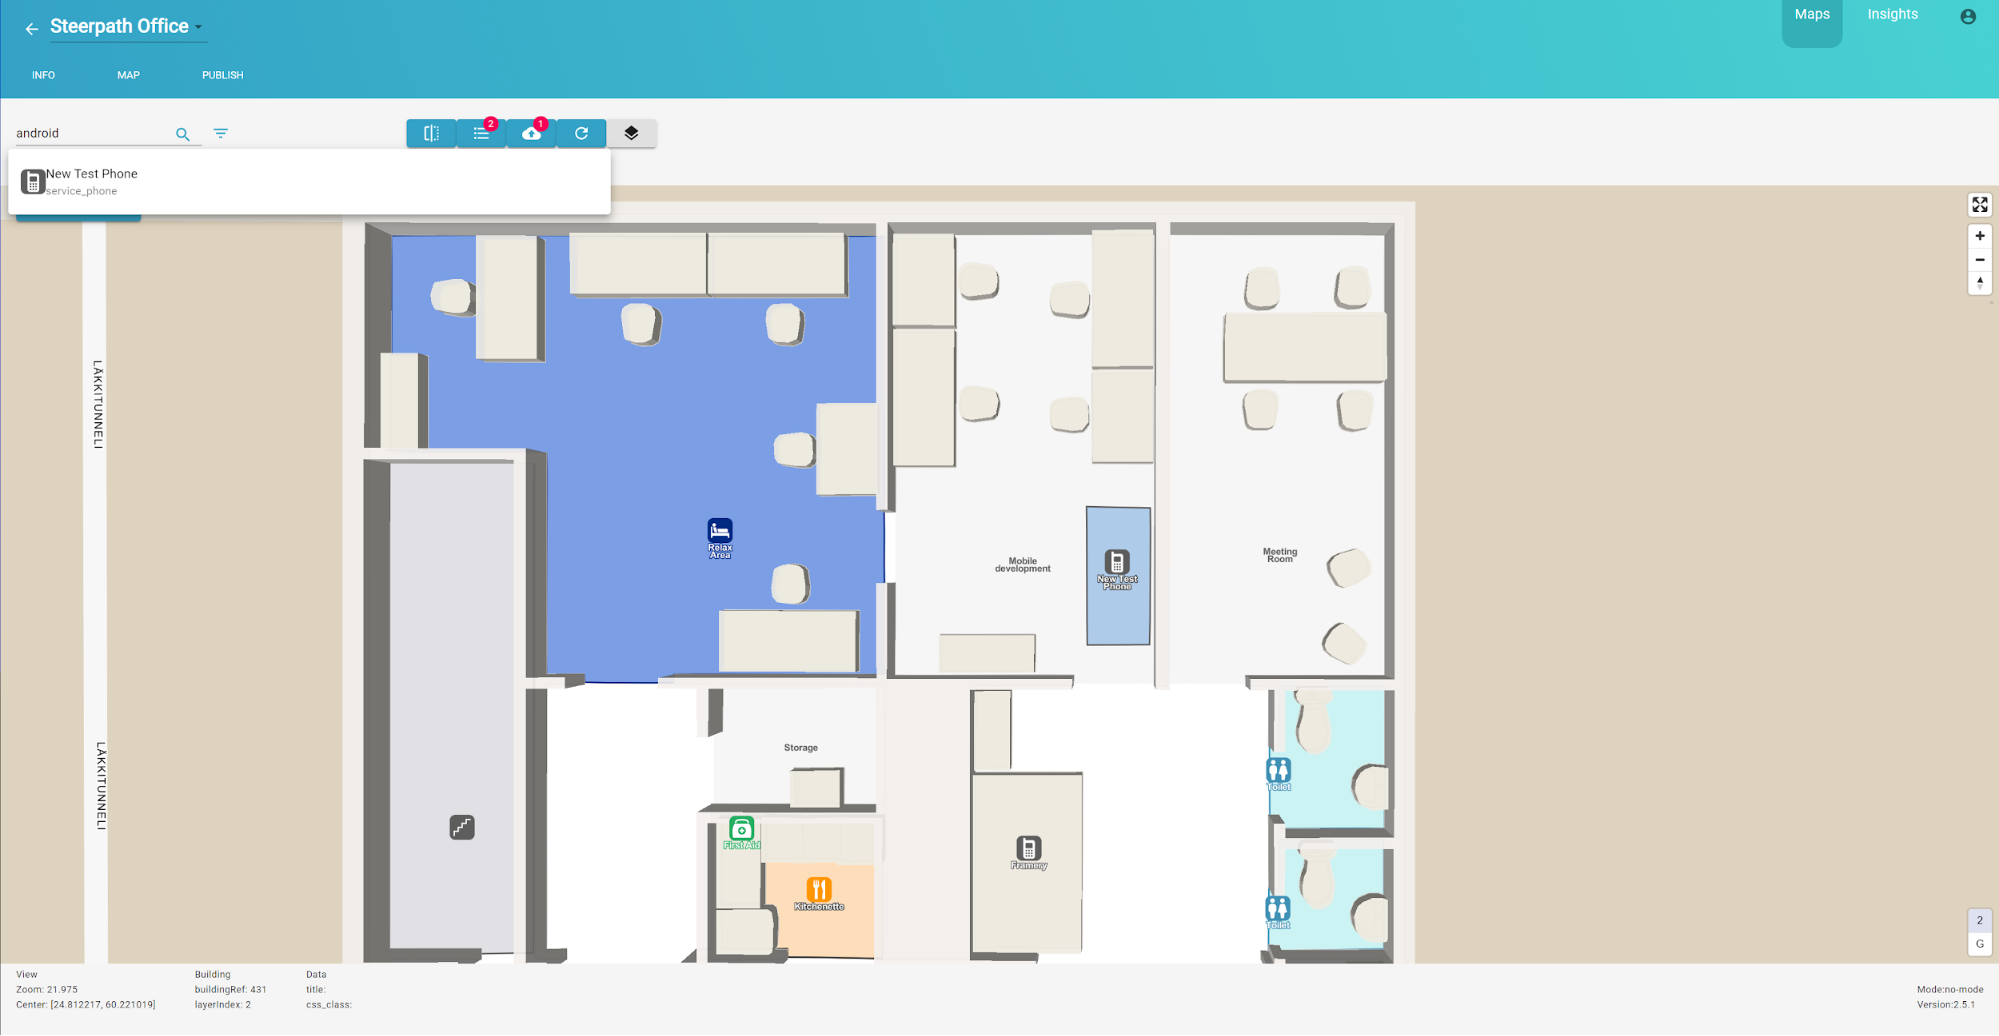
You can search your POI data from the Top Bar. You can narrow the search from the filter menu next to the search input. In this example we’ll search for all POIs with the tag “android” in their data.
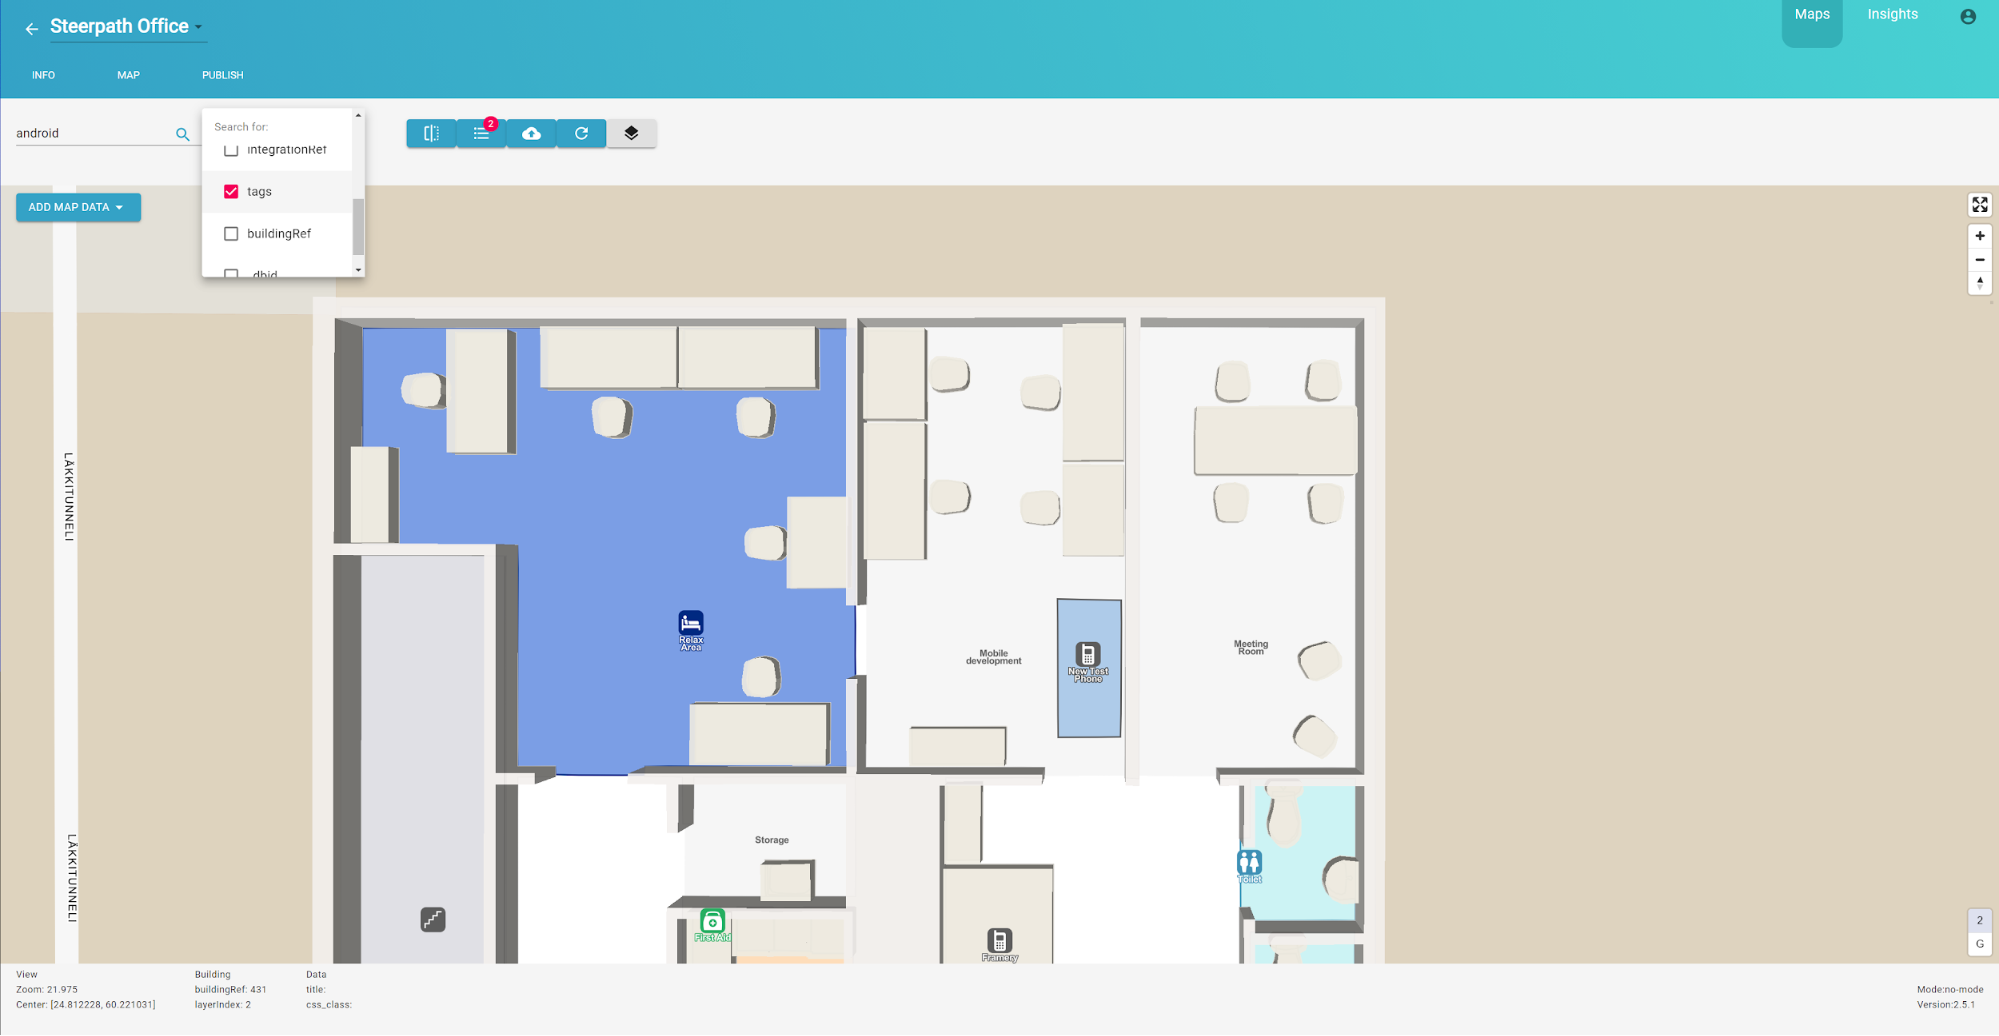
The result will be the first POI we created. You can select the searched POI for editing.
Select similar
If you have a lot of POIs and you’d like to edit all similar types of POIs at once you can use the “Select Similar” feature from the Sidebar. In this example we will select all the rooms in our current floor and give them a common tag.
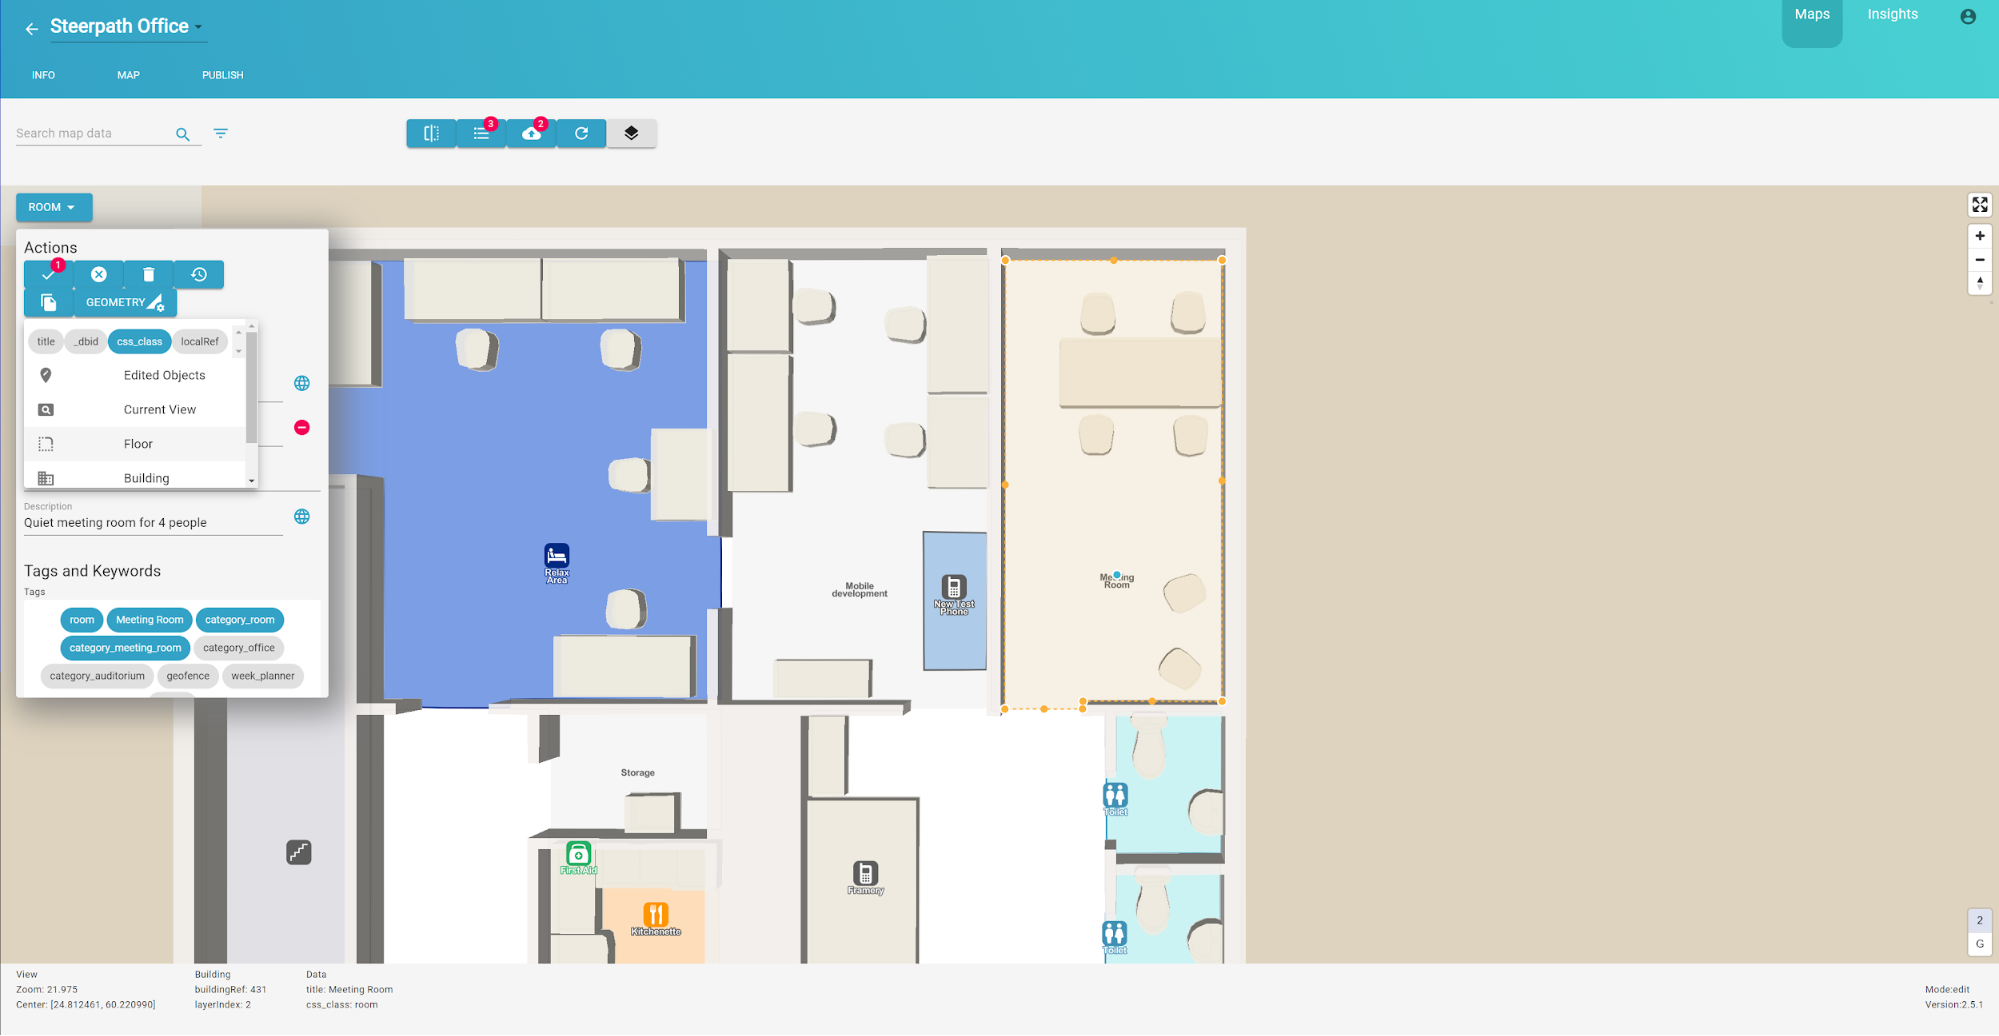
As you can see 4 POIs were selected and the Sidebar will inform the status of the attributes if they happen to vary. You can add a common tag from the Sidebar and make all the selected POIs to have it. The chip colour will be dark blue if the tag is selected by all the POIs.
Multiple Selection
There are other ways to select multiple POIs for the edit. You can use box selection by holding Shift-key while dragging the map. You can also select multiple POIs by holding Alt-key while clicking them on Map.
Keyboard Shortcuts
Here’s a table of shortcut edits
|
cmd/ctrl + s |
Save and upload |
|
cmd/ctrl + d |
Delete |
|
Backspace |
Cancel edits |
|
Escape |
Confirm edits |
|
Enter |
Confirm edits |
Cancel Edits
You can cancel your edits by pressing backspace or by selecting “Cancel Changes” from the Sidebar. This action will reset your changes. New added POIs will be removed.
Restoring POI
You can also restore the POI the way it was originally from the CAD data. This can be done from the Sidebar.
Publishing
From the publish tab you can upload changed to production. This will make the changes you made visible in the public maps which you can see from the Profile page. In the Publish page you can compare the changes you’ve made with the slider. Your state is presented so that data in the editor is visible on the left and data on the production is visible on the right.
Uploading may take a while but when it’s done you can see the changes from the link found in the Profile page.
You can start building your websites and applications with the published maps. Published maps can be thought of as the production state of your venue.
You can visit our web page to learn more about building software using Steerpath Maps and SDK https://steerpath.com/.
Copyright Steerpath. All rights reserved.
Comments
0 comments
Please sign in to leave a comment.